Updated February 2025: Stop getting error messages and slow down your system with our optimization tool. Get it now at this link
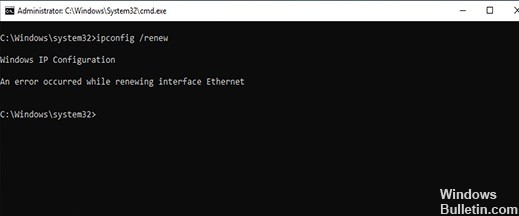
An error occurred while updating the Ethernet interface – failed to contact your DHCP server. If you try to run the command: IP config /renew, you may also get the error “unable to contact your DHCP server“. This means that your network card cannot contact the DHCP server for the new lease, which is used to get the new IP address.
When you try to lease, release, or extend an IP address, you may encounter the “unable to contact your DHCP server” error message. What should you do? Read this message from Windows Bulletin. You will find several effective methods of solving this problem.
What causes the message “An error occurred while updating the Ethernet interface”?

It turns out that there are several different documented scenarios that can cause this error code to appear. Here’s a shortlist of possible culprits that can cause this particular error:
TCP/IP inconsistency: in most documented cases, this problem is due to improper caching of IP and TCP temporary data, which cannot be cleared in the traditional way. If this scenario applies, you should first do a full reset of Winsock and see if you can restore the ability to run IP config commands.
Common network card problem: If the problem is related to a relatively common problem with your network card, you can solve it by running the network card troubleshooter and applying the recommended solution.
Outdated/incompatible network card driver: If this problem occurred after upgrading to Windows 10 from an older version of Windows (Windows 7 or Windows 8.1), it is most likely a partially incompatible network adapter driver. In this case, you can solve the problem by updating the network adapter to the latest version available through Device Manager.
DHCP Client service is disabled: Another possible cause of this error is that the DHCP Client service is disabled due to manual user intervention or optimization analysis by a third-party management tool. In this case, you can solve the problem by re-enabling the DHCP Client service on the Services tab and changing the default startup type.
Quick Launch Conflict: It turns out that some network adapter drivers may have a conflict between the Quick Launch feature and Windows 10. If you don’t want to replace the current driver, the only solution you can use to solve this problem is to disable the QuickStart feature in the Power Options menu.
Network mismatch: according to several concerned users, this problem is often related to a network problem indirectly caused by your router’s built-in firewall or some other type of system-level restriction. In this case, the likely solution is to reset the router to its default settings.
System file mismatch: In some circumstances, you can expect this error if some of your system files used when the operating system needs to execute terminal commands are affected by corrupt system files. In this case, you need to update all Windows files using procedures such as Clean Install or Repair Install to solve the problem.
Now that you know all the potential culprits, here is a list of methods that other concerned users have successfully used to fix the error and use IP config commands normally.
How to fix the error `An Error Occurred While Renewing Interface Ethernet`
You can now prevent PC problems by using this tool, such as protecting you against file loss and malware. Additionally, it is a great way to optimize your computer for maximum performance. The program fixes common errors that might occur on Windows systems with ease - no need for hours of troubleshooting when you have the perfect solution at your fingertips:February 2025 Update:

Windows Network Diagnostics or Network Troubleshooter
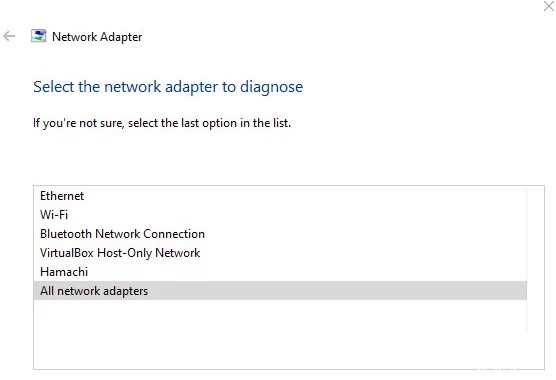
- Right-click the network icon in the Windows notification area and select Troubleshooter from the context menu. Windows checks the network and possible problems.
- After analysis, you may see that DHCP is not enabled for the LAN connection.
- In this case, select Try these repairs as administrator and follow the instructions.
- Windows will fix the problem and enable DHCP for the adapter to regain access to the Internet and network if it relies on DHCP.
Check your network adapter settings
- Open the Network Settings window or the Internet Connection window as follows: Open the Run dialog box by pressing the Windows logo key + the R key at the same time, type ncpa.CPL, then click OK.
- Double-click the active NIC, then click Properties and look for the Internet Protocol version 4 (TCP/IPv4) entry in the list, select it, then click Properties.
- Make sure that Obtain an IP address automatically and Obtain DNS server address automatically are selected.
- Click the Advanced button and make sure DHCP Enabled is listed.
- Repeat the above steps if you also or exclusively use IPv6.
Resetting the network adapter driver
- Open the Device Manager window the following way: use the Windows + R shortcut to open the Run dialog box, then type devmgmt.MSC in the box, or type Device Manager in the search box next to the button in the Start menu.
- Expand Network Adapters to display all network adapters installed on your device.
- Right-click the network adapter and select Properties.
- Click the Drivers tab and then click the Reset driver option.
- Reboot your computer and see if the problem persists on the command line.
Updating the network adapter driver
- Open the Device Manager window as follows: use the Windows + R shortcut to open the Run dialog box, then type devmgmt.MSC in the box, or type Device Manager in the search box next to the button in the Start menu.
- Expand Network Adapters to display all network adapters installed on your device.
- Right-click the network adapter you want to remove and select Uninstall Device to remove the adapter from the list and uninstall the network device.
- Click OK when prompted to remove the device.
- Remove the adapter from your computer and visit the manufacturer’s website to download and install the latest drivers.
- Restart your computer and verify that the problem is gone.
Restart the DHCP client service
- Open the “Services” window as follows: Open the “Run” dialog box by pressing the Windows + R keys on your keyboard. Type services.MSC and click OK.
- Find the DHCP client service in the list of services, right-click it and select Properties.
- Stop the service.
- Set the startup type to Automatic.
- Click the Start button to start the service.
Ipconfig with the Registerdns
- Open cmd with the “Run as administrator” option.
- Enter the following command: IP config /register DNS
- Once the “operation completed successfully” message appears on the command line, click the close button or type “exit” at the command prompt.
- Reboot your computer and see if the problem is resolved.
Expert Tip: This repair tool scans the repositories and replaces corrupt or missing files if none of these methods have worked. It works well in most cases where the problem is due to system corruption. This tool will also optimize your system to maximize performance. It can be downloaded by Clicking Here
Frequently Asked Questions
How do I release and renew my IP address?
- Launch the Settings app.
- Tap Wi-Fi.
- Tap the "I" icon to the right of the Wi-Fi network you're currently connected to.
- Renew your lease. In the pop-up window, tap Renew Share again.
Why can't I renew my IP address?
The "Cannot renew IP address" error message on your Windows PC is caused by an IP address conflict with another device, problems with your Windows network settings, or problems with your network adapter or router. In most cases, running the Windows Network Diagnostics tool should resolve network connectivity issues.
How can I fix a DHCP error?
- Use the network troubleshooter.
- Configure your network adapter settings.
- Activate the DHCP client.
- Check your Windows firewall.
- Temporarily disable your main antivirus software.
- Disable your proxy server.
- Restore your drivers.
How to troubleshoot not being able to contact the DHCP server?
- Press the Windows + X key and select Device Manager.
- Select a category to see the names of the devices, then right-click on the device you want to update.
- Select Update Driver.
- Click Verify driver software update automatically.
- Once the update is complete, you'll be ready to go.
