Updated February 2025: Stop getting error messages and slow down your system with our optimization tool. Get it now at this link

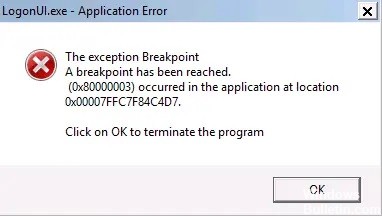
LogonUI.exe is an application that helps your computer set up an interface that allows you to log in. But sometimes corrupting this application can make it difficult for you to access your system, causing a fatal BSOD crash when trying to log in.
Don’t worry. There are some solutions to this problem. The most popular ones are restoring LogonUI.exe, initiating automatic boot recovery, etc.
What causes LogonUI.exe error?

The main reason for this error is a corrupt or missing LogonUI.exe file, which explains why you are facing this error.
There is more than one reason for this error. For example, hard drive failure, RAM module problems, faulty data cable, power supply can’t provide proper voltage or current for hard drives, corrupt user profile, corrupt system files, and more.
How to fix the LogonUI.exe error?
You can now prevent PC problems by using this tool, such as protecting you against file loss and malware. Additionally, it is a great way to optimize your computer for maximum performance. The program fixes common errors that might occur on Windows systems with ease - no need for hours of troubleshooting when you have the perfect solution at your fingertips:February 2025 Update:

Reinstall your video card driver
- If Windows can’t start normally, start it in Safe Mode.
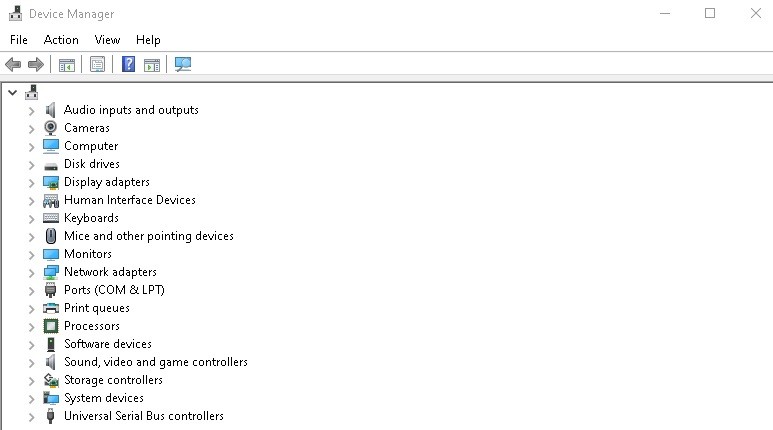
- Now open the Device Manager and find your video card.
- Right-click on it and select Uninstall Device.
- A confirmation dialog box will appear.
- Select the Remove driver software for this device checkbox and click the Uninstall button.
According to users, the LogonUI.exe application error may be related to your video card driver. Some users reported that they solved the problem by simply reinstalling the video card driver.
Reset Windows 10 settings
This solution will delete all the files on your system drive, so you should back them up first.
- Reboot your computer several times during the boot sequence.
- Select Troubleshooting > Reset this PC > Delete All.
- To proceed to the next step, you may be prompted to insert the Windows 10 installation media, so have it ready.
- Select your version of Windows and select Only drive where Windows is installed > Delete my files only.
- You should now see a list of changes made as a result of the reset.
- Click the Reset button to start the process.
- Now follow the instructions on the screen to complete the Windows 10 reset.
Perform a system restore
- Press the Windows + S key and type System Restore.
- Select the ‘Create restore point’ option from the menu.
- The System Properties window will appear. Click the System Restore button.
- The System Restore window opens. Click Next.
- You should now see a list of all available restore points.
- If available, activate the Show other restore points option.
- Select the desired restore point and click Next to continue.
- Follow the on-screen instructions to complete the recovery process.
Disabling PIN Login
- Open the Settings app. You can do this quickly by pressing the Windows + I key combination.
- Go to the “Accounts” section.
- Now click on Login Settings on the left menu, scroll down to the PIN section and click on Delete.
- Windows will ask you to confirm that you want to delete the PIN. Click the Delete button.
- To delete the PIN, all you have to do is enter your password and click OK.
- After deleting the PIN, the error message should disappear and you should be able to use Windows without any problems.
Expert Tip: This repair tool scans the repositories and replaces corrupt or missing files if none of these methods have worked. It works well in most cases where the problem is due to system corruption. This tool will also optimize your system to maximize performance. It can be downloaded by Clicking Here
Frequently Asked Questions
How do I start in safe mode?
- Press the Windows logo + I key on your keyboard to open settings.
- Select Update and security -> Restore.
- Under Advanced Startup, select Restart Now.
- After your computer restarts and the Select Option screen appears, select Troubleshooting -> Advanced Options -> Startup Settings -> Restart.
How do I fix the LogonUI exe error on startup?
- Open the Start menu and click the Power icon.
- Now hold down the Shift key and select Restart from the menu.
- Now select Advanced Options > Startup Options. Click the Restart button.
- When the PC restarts, you will be presented with a list of options.
How do I restore the Windows LogonUI exe?
Boot from the Windows 10 DVD/USB drive. After selecting your language, time, and keyboard settings, click Next to load the following window, then click the Restore Computer link in the lower-left corner of the window. This will bring up an options screen where you can select a troubleshooting option.
What causes the LogonUI exe error?
LogonUI is the Windows program that is responsible for the interface you see on the login screen. The error message you get indicates that the Logonui.exe file itself has been corrupted or that another program has interfered and caused LogonUI to produce these results.
