Updated February 2025: Stop getting error messages and slow down your system with our optimization tool. Get it now at this link

Sometimes actual Windows processes cannot work properly, which causes high CPU usage and slows down your computer. Audiodg.exe is such a service.
This process, created by Windows to manage the system’s audio functions, is known for often causing problems and using 100% of computing resources. Why do these problems occur and how can they be solved? Find out in this article.
What causes high CPU usage of audiodg.exe file?

- It is possible that the sound driver is not updated.
- Drivers required for gaming devices may not be updated.
- If certain audio effects are enabled, this process is accelerated.
How to solve the problem of high CPU load by audiodg.exe?
You can now prevent PC problems by using this tool, such as protecting you against file loss and malware. Additionally, it is a great way to optimize your computer for maximum performance. The program fixes common errors that might occur on Windows systems with ease - no need for hours of troubleshooting when you have the perfect solution at your fingertips:February 2025 Update:

Update drivers
- Press Windows + S to open the search menu.
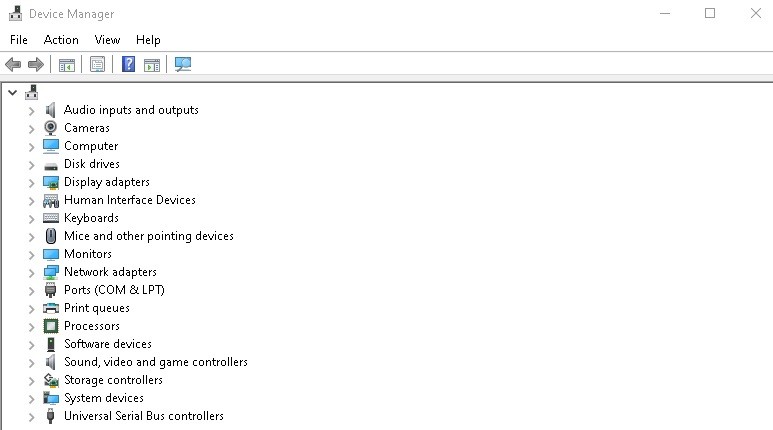
- Type Device Manager in the text box at the top, then click the appropriate search result that appears.
- Find the Sound, Video, and Game Controllers entry and double-click it.
- Right-click on the sound card and select Update Drivers from the context menu.
- Select Automatically check for drivers from the two options that appear in the Update drivers window.
- Windows will search for the best available drivers for your system and install them.
Disabling Sound Enhancement
- Press Windows + S to display the search menu.
- In the text box above, type Change system sounds and click the appropriate search result that appears.
- Click the Playback tab in the Sound window.
- Right-click on the device you are using and select Properties from the pop-up menu.
- Then click the Enhancement tab in the Speaker Properties window, select the Disable All Enhancements check box, and click OK at the bottom to save your changes.
Disable Volume Control
- Press Windows + S to display the search menu.
- Type Change system sounds in the top text box and click the corresponding search result that appears.
- Click the Communication tab at the top of the page.
- Then select Do Nothing and click OK to save your changes.
Decrease the audio sampling rate
- Press Windows + S to display the search menu.
- In the top text box, type Change system sounds and click the appropriate search result.
- Switch to the Playback tab at the top.
- Right-click on the speaker you are currently using and select Properties from the pop-up menu.
- Then click the Advanced tab in the Properties window at the top.
- Click on the Sample Rate drop-down menu and select a smaller value from the list.
- Click OK to save your changes and close the window.
Expert Tip: This repair tool scans the repositories and replaces corrupt or missing files if none of these methods have worked. It works well in most cases where the problem is due to system corruption. This tool will also optimize your system to maximize performance. It can be downloaded by Clicking Here
Frequently Asked Questions
How can I troubleshoot Audiodg exe in Windows 10?
- Uninstall Skype and install it again.
- Update the audio driver.
- Disable all sound effects.
- Perform audio troubleshooting.
- Scan your computer with an antivirus program.
How to get rid of Audiodg exe?
- Hold down the Windows logo and press R.
- Type Devmgmt.
- Expand sound, video, and game controllers.
- Right-click Sound Card and select Remove.
What is Audiodg EXE?
Essentially, Audiodg.exe [Windows Audio Device Graph Isolation] file contains the operating system audio engine. So this file is used for any audio processing and digital signal processing (DSP).
