Updated February 2025: Stop getting error messages and slow down your system with our optimization tool. Get it now at this link
- Download and install the repair tool here.
- Let it scan your computer.
- The tool will then repair your computer.
GeForce Experience is incredibly powerful software that works great with the GeForce GTX Series graphics cards. By installing this application on your computer, you no longer have to worry about driver updates. In addition, your game’s graphics settings are automatically optimized for the best gaming experience.

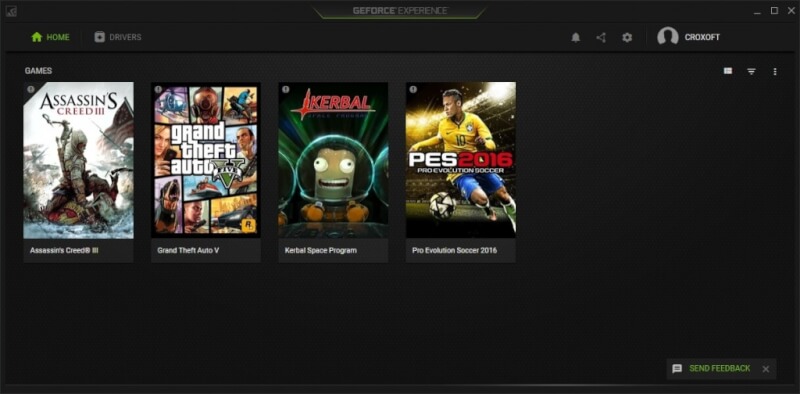
However, some users have had problems with GeForce Experience software not finding their local games as well as Steam games. Since this affects your ability to use the full power of your GTX graphics card, the annoyance is understandable.
Make sure that your game is supported.
GeForce Experience uses the locations listed on the Settings -> Games tab to find the games. Add a location where your game is installed if you choose a different directory from the default path to the game.
The GeForce Experience Scan feature for games only supports unprotected directories. Directories with limited access (e.g., network shares, home directories, etc.) are not supported.
GeForce Experience creates a new user named UpdatusUser. If this user profile does not have read access to the directory where your games are installed, Geforce Experience cannot find those games.
Supported games must be upgraded to the latest version available from the developer. The Geforce interface does not recognize old versions of the game, gameplay loopholes or other mods that modify the executable version of the game.
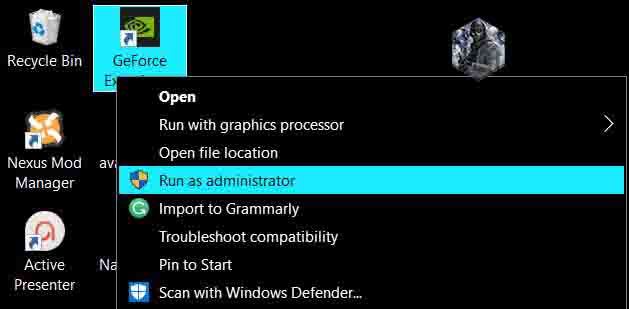
Run the GeForce Experience as an administrator.

This is probably the easiest way to try it in this article. It gave excellent results for users struggling with this problem. The explanation is that the games are probably installed in a folder that is not fully accessible without administrator rights. By providing this access, GeForce Experience can find the games and include them as such.
- First, you need to find the GeForce Experience executable file. This can be on your desktop. If not, try looking for it on the Start menu. Right-click the first result and select “Open file location”. The “Start” menu shortcut should appear in the folder. Click it again with the right mouse button and select “Open file location” again.
- You can also check the folder where the default GeForce Experience installation folder is located:
- C: \ Program Files (x86) \ NVIDIA Corporation \ NVIDIA GeForce Experience
- When you find it, right-click the NVIDIA GeForce Experience executable file and select “Properties” from the context menu that appears. Be sure to navigate to compatibility
- Select the check box next to Run this program as administrator and click OK to apply the changes you have made. Open GeForce Experience again and see if the problem persists!
Make sure that the installed game directory is marked with

- Open the GeForce Experience application.
- Go to the settings.
- Click Games.
- See which GeForce Experience folders to check and where you installed your games.
- If there is a discrepancy between the two options, add a link to the folder where you installed the games (e.g., D: Games).
- Once you’ve done this, restart the GeForce Experience application and see if the problem has been resolved.
February 2025 Update:
You can now prevent PC problems by using this tool, such as protecting you against file loss and malware. Additionally, it is a great way to optimize your computer for maximum performance. The program fixes common errors that might occur on Windows systems with ease - no need for hours of troubleshooting when you have the perfect solution at your fingertips:
- Step 1 : Download PC Repair & Optimizer Tool (Windows 10, 8, 7, XP, Vista – Microsoft Gold Certified).
- Step 2 : Click “Start Scan” to find Windows registry issues that could be causing PC problems.
- Step 3 : Click “Repair All” to fix all issues.
Install the correct folders as the location for the game.
GeForce will not detect a game error when installing games in different locations. For example, you install these games on different hard drives. To avoid this problem, make sure you add the right folders as the location of the game. Okay:
Step 1: Find and open the GeForce Experience executable file.
Step 2: On the Control Panel, go to the Games section on the Settings tab and check the Search for Games checkbox.
Step 3: If the folder where the affected game is located does not exist, click “More” and select the folder where your game is located.
Now GeForce Experience will search for installed games and you can check if the problem has been solved or not.
Update your NVidia driver

Some users fix the fact that GeForce Experience doesn’t find the game by simply updating the NVidia drivers. This error may occur if you are using GeForce Experience with an outdated driver. Here is how to update NVidia drivers with GeForce Experience.
Step 1: Start the GeForce Experience client and click the Drivers tab at the top menu bar.
Step 2: Click the Check for Updates button at the top right. Then wait a bit to see if any drivers are available.
Step 3: If a new driver is found in the “Available” section, click the green “Download” button. Then install it on your computer.
After installation is complete, restart your computer and restart the GeForce Experience client to see if the problem persists.
Expert Tip: This repair tool scans the repositories and replaces corrupt or missing files if none of these methods have worked. It works well in most cases where the problem is due to system corruption. This tool will also optimize your system to maximize performance. It can be downloaded by Clicking Here
