Updated February 2025: Stop getting error messages and slow down your system with our optimization tool. Get it now at this link
- Download and install the repair tool here.
- Let it scan your computer.
- The tool will then repair your computer.
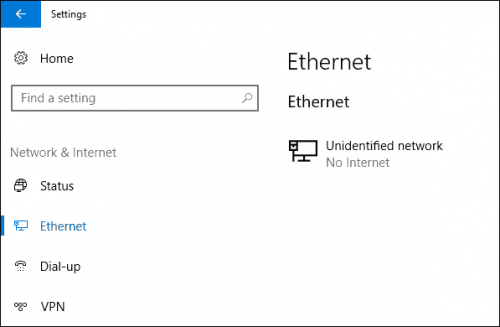
Some users reported an error called “Local connection only” or “Unidentified network, no Internet access”. So, if you see a yellow exclamation mark on the network icon, you can’t surf the Internet. The problem is not so serious and can be easily solved.

Unidentified Network – No Internet Access is a problem that prevents the Windows computer from accessing the Internet, creating connectivity problems for users by limiting their access to the Internet to the use of different services and obtaining different information. This problem can occur on any Windows computer, whether it is Windows 7, 8 or 10.
Ways to fix Ethernet Unidentified Network – No Internet Access
Check the TCP/IP settings
- This error can also be caused by problems with the operation of the DHCP server on the router (whose task is to distribute IP addresses). So restart the router.
- Try disabling and then activating your Ethernet connection from the Control Panel.
- Check the current IP address (ipconfig). If it starts at 169.254, it means that the computer cannot get the IP address of the DHCP server.
- The problem may be the IP settings of IPv4 in the properties of your Internet connection. If some static parameters are already set there, it is quite possible that they are incorrectly set. You can try to configure automatic IP reception or define static settings (if you are connected via a router or if your provider specifies a static IP).
- Go to Control Panel -> Network and Internet -> Network Connections with the right mouse button on your network connection and select Properties.
- Select Internet Protocol Version 4 (TCP/IPv4) and press Properties.
- Another window opens and you can make the necessary IP settings for this connection here. If you have already defined some settings, you can try to get an IP address automatically and define a DNS server address automatically (you can also specify the IP address of the Google DNS server – 8.8.8.8.
- You should remember the listed settings (for example, you can take a screenshot; you may want them to be written back).
- Save the changes and restart the computer.
February 2025 Update:
You can now prevent PC problems by using this tool, such as protecting you against file loss and malware. Additionally, it is a great way to optimize your computer for maximum performance. The program fixes common errors that might occur on Windows systems with ease - no need for hours of troubleshooting when you have the perfect solution at your fingertips:
- Step 1 : Download PC Repair & Optimizer Tool (Windows 10, 8, 7, XP, Vista – Microsoft Gold Certified).
- Step 2 : Click “Start Scan” to find Windows registry issues that could be causing PC problems.
- Step 3 : Click “Repair All” to fix all issues.
Update the Network Card Driver
You can update your drivers automatically, either with the free version or with the Pro version of Driver Easy. But with the Pro version, it only takes 2 clicks:
1) Download and install Driver Easy.
2) Start Driver Easy and click on the Scan Now button. Driver Easy then analyzes your computer and detects any problematic drivers.
3) Click the Update button next to the network card device to automatically download and install the correct version of this driver (this is possible with the free version).
Or click Update All to automatically download and install the correct version of any missing or obsolete drivers on your system (this requires the Pro version – you will be prompted to update when you click Update All).
Temporarily Disable Windows Firewall

Windows Defender Firewall is a Microsoft integrated security application that manages and filters your network transfers. Sometimes, the security application may be the cause of the problem, so you must temporarily disable the Windows Defender firewall to exclude such a possibility. Here is the procedure:
- Press the Windows + I button to open the settings.
- Search for ‘Windows Defender Firewall’, then select ‘Windows Defender Firewall’.
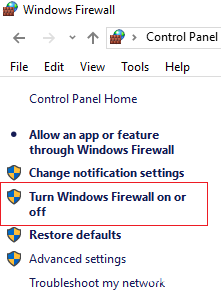
- Click on ‘Turn Windows Defender Firewall on or off’ on the left side.
- Check the ‘Turn off Windows Defender Firewall’ boxes under both settings.
- Check if this solves your problem.
Expert Tip: This repair tool scans the repositories and replaces corrupt or missing files if none of these methods have worked. It works well in most cases where the problem is due to system corruption. This tool will also optimize your system to maximize performance. It can be downloaded by Clicking Here
