Updated February 2025: Stop getting error messages and slow down your system with our optimization tool. Get it now at this link

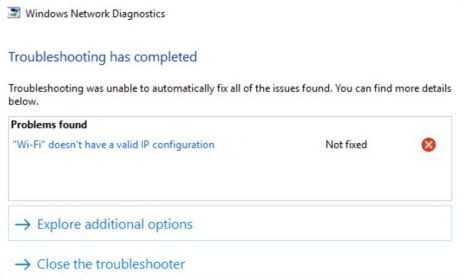
Do you regularly encounter the “Wi-Fi does not have a valid IP configuration” error message when diagnosing an inactive Internet connection in Windows 10? This happens when your computer cannot get a working IP address (Internet Protocol) via Wi-Fi. A similar IP-related error can also occur on an Ethernet network.
If restarting your computer didn’t solve the problem (try it if you haven’t already), the following troubleshooting tips should help you solve the problem.
What causes the “Wifi does not have a valid IP configuration” message?

This error occurs when the router’s IP address configuration does not match the IP reported by the Wifi network adapter. This can occur after a Windows update or if network changes have been made that have not been communicated to the network adapter. It can also be caused by driver errors, malfunctioning routers, or DNS problems.
If you want to try troubleshooting the error yourself, follow the instructions below.
How to repair the “The Wi-Fi network does not have a valid IP configuration” error message?
You can now prevent PC problems by using this tool, such as protecting you against file loss and malware. Additionally, it is a great way to optimize your computer for maximum performance. The program fixes common errors that might occur on Windows systems with ease - no need for hours of troubleshooting when you have the perfect solution at your fingertips:February 2025 Update:

Make sure that DHCP is enabled
- Open Network Connections.
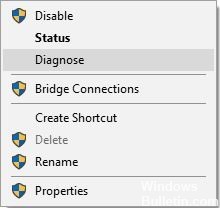
- Find your network adapter, right-click on it and select Diagnostic.
- Wait until the scan finishes.
Perform a reboot
- Press the Windows + R keys, type MSConfig and press Enter.
- Select Selective Startup and uncheck Load Startup Items.
- Click the Services tab, select Hide all Microsoft services, and then click the Disable All button.
- Click the Startup tab and click Open Task Manager, then Apply and OK.
- Right-click each item in the list and select Disable.
- Close Task Manager and click Apply and OK in the Windows Setup window.
- Restart your computer.
Set the channel width to Auto
- Press the Windows + X key and choose Network Connections from the menu.
- Right-click the wireless connection and choose Properties from the menu.
- Click the Configure button and click the Advanced tab.
- Find the 802.11n channel width for band 2.4 and set it to Automatic.
- Click OK to save your changes.
Uninstalling the wireless adapter driver
- Press the Windows + X key and select Device Manager.
- Find your wireless device, right-click it and select Uninstall Device.
- If applicable, select the Uninstall driver software for this device check box and click OK.
- Restart your computer.
Expert Tip: This repair tool scans the repositories and replaces corrupt or missing files if none of these methods have worked. It works well in most cases where the problem is due to system corruption. This tool will also optimize your system to maximize performance. It can be downloaded by Clicking Here
