Updated February 2025: Stop getting error messages and slow down your system with our optimization tool. Get it now at this link

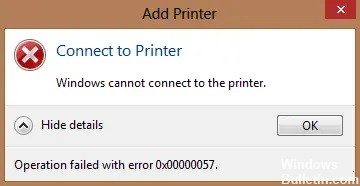
I ran into the following problem a few times: When I tried to connect a network printer from one of the print servers, the error 0x00000057 Windows cannot connect to the printer was displayed on the client computer. The error occurred during the installation of the printer driver from the print server and, I later discovered, is fixed on the client-side. The steps to resolve this problem are described below.
Connecting to a printer
Windows fails to connect to a printer.
The operation ended with error 0x00000057.
What causes printer error 0x00000057?

- Missing or corrupted Windows files are the main cause of printer installation error 0x00000057 on your PC.
- Another possible cause of the printer installation error is corrupted printer drivers.
- An improperly configured network connection can also prevent the device from connecting to the printer through the server.
How to resolve printer error 0x00000057?
You can now prevent PC problems by using this tool, such as protecting you against file loss and malware. Additionally, it is a great way to optimize your computer for maximum performance. The program fixes common errors that might occur on Windows systems with ease - no need for hours of troubleshooting when you have the perfect solution at your fingertips:February 2025 Update:

Manually reinstall the printer and drivers
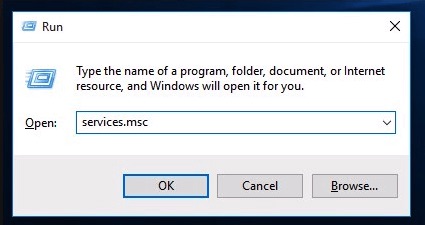
- Press Windows + R, type “services.MSC” and press Enter.
- Find the Print Spooler service, right-click it, and choose Stop.
- Press Windows + R again, type printui.exe /s /t2 and press Enter.
- In the Properties window of the print server, find the printer with which you have a problem.
- Then uninstall the printer, and if you are asked if you want to remove the driver as well, choose Yes.
- Then go back to services.MSC, right-click on Print Spooler, and select Start.
- Finally, try installing the printer again.
Adding a local server via Print Manager
- Press Windows + R, type MMC and press Enter to open the Microsoft Management Console.
- Then click File and select Add/Remove Snap-in.
- Then select the following options:
- Manage Print> Click Add Local Server> Done> OK
- Now expand the print server, then the local server, and finally click on Driver.
- Find the driver that is causing you problems and uninstall it.
- Reinstall the printer and you should be able to resolve error 0x00000057.
Adding a local printer over the network
- Press the Windows + X key and select Control Panel.
- Then select Devices and Printers and click Add Printer.
- Select Create New Port and select the Local Port type.
- Then enter the network path to the printer (for example, \ComputernameSharedPrinterName) as the port name.
- Then select the printer from the list and select Replace Currently Installed Driver.
- Determine whether the printer should be shared, and then select whether to make it the default printer.
- You have successfully and correctly installed the printer.
Rename the driver files
- Press the Windows + R key combination, type “%systemroot%\Nsystem32\driverstore” and press Enter.
- Be sure to rename the following files:
infcache.1
infpub.dat
infstor.dat
infstrng.dat - If you cannot rename these files, you will need to take ownership of the above files.
- Then try installing the printer drivers again.
Expert Tip: This repair tool scans the repositories and replaces corrupt or missing files if none of these methods have worked. It works well in most cases where the problem is due to system corruption. This tool will also optimize your system to maximize performance. It can be downloaded by Clicking Here
Frequently Asked Questions
How do I solve a printer error?
- Open printer troubleshooting.
- Type "Troubleshooting" in the text box to find the troubleshooting settings.
- Delete the print pool folder. Users have also reported that they have eliminated the print error by deleting the print spooler folder.
- Check the printer's connection settings.
How do I get the printer out of an error condition?
Sometimes simply restarting the computer and printer can be the solution to the "printer in error" problem. Turn off the printer and computer completely, leave them in that state for a few minutes, then turn it back on and see if the problem is resolved.
How do I uninstall the printer driver completely?
Click (Start), then select (Devices and Printers). Right-click the printer icon, and then select (Remove Device). To remove a particular printer driver from among several printer drivers, select the printer driver you want to remove from (Remove Print Queue). When a confirmation message appears, click (Yes).
