Updated February 2025: Stop getting error messages and slow down your system with our optimization tool. Get it now at this link

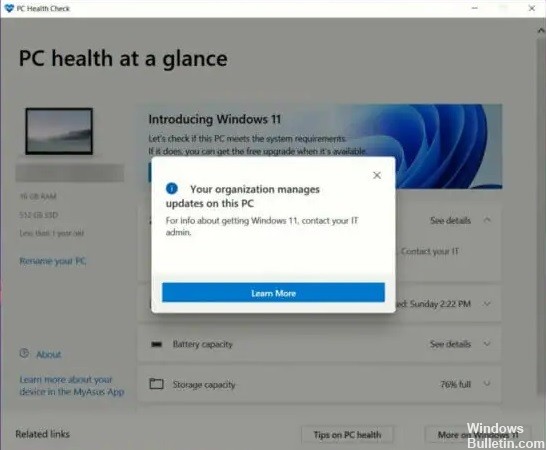
If you get the message “Your organization is managing updates on this PC” when you use the PC Health Check application on your computer, you can resolve the issue by following the instructions below. This error occurs even if you are not logged into a school or work account or organization. Here are some quick solutions you can try to get rid of this problem.
The full error message looks something like this:
Your organization manages updates on this PC.
You can get information about installing Windows 11 from your IT administrator.
What causes the “Your organization manages updates on this PC” message?

- Limited administrator rights.
- Incorrectly configured registry settings.
- The influence of Windows Defender, which can block certain applications or services.
- Problems with “Windows Hello” when trying to add your fingerprint.
- Incorrect date and time settings.
How do I get rid of the “Your organization manages updates on this PC” problem?
You can now prevent PC problems by using this tool, such as protecting you against file loss and malware. Additionally, it is a great way to optimize your computer for maximum performance. The program fixes common errors that might occur on Windows systems with ease - no need for hours of troubleshooting when you have the perfect solution at your fingertips:February 2025 Update:

Utilize an administrator account
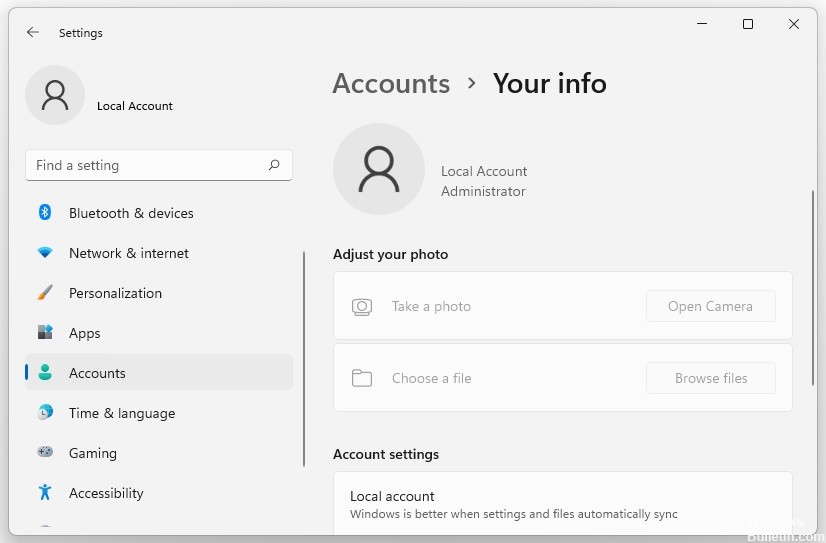
- Open the Settings app again, select the “Accounts” tab, and click on “Your Data” on the right side of the window.
- You can then check to see if your account role appears as an administrator.
- If it is not, you will need to contact your system administrator to update your account or get your administrator account credentials.
- You can now log in to your administrator account and see if the error has disappeared.
Change the diagnostic data settings
- Open the Settings window, select the Privacy and Security tab in the left pane and click Diagnostics and Feedback.
- Go to Send additional diagnostic data and set the switch to On.
- Then restart your computer.
Log out of your Microsoft account
- Click the Start icon on the taskbar and select Settings.
- Select Accounts on the left side and click Access to work or school on the right side.
- Select an email account and click Disable next to the school or work account.
- Then click Yes in the confirmation pop-up window.
- Click Disable, enter your alternate account information and then click OK.
Changing some Group Policy Editor settings
- Open the Run box again, and type gpedit.MSC and press Enter.
- In the Group Policy Editor window, go to the following path and double-click the Manage end-user experience
- directory in the right pane.
- Computer Configuration/Administrative Templates/Windows Components/Windows Update.
- Double-click Configure Automatic Updates DWORD, select the Not configured option, and click Apply and OK to close the window.
- Now reboot your computer.
Expert Tip: This repair tool scans the repositories and replaces corrupt or missing files if none of these methods have worked. It works well in most cases where the problem is due to system corruption. This tool will also optimize your system to maximize performance. It can be downloaded by Clicking Here
Frequently Asked Questions
How do I solve the "Your organization manages updates on this computer" problem?
- Use an administrator account.
- Log out of your work or school account.
- Edit the Windows registry.
- Change the Group Policy Editor settings.
- Change the diagnostic data settings.
What is the reason for "Your organization manages updates on this PC"?
- Limited administrator rights.
- Incorrectly configured registry settings.
- Incorrect date and time settings.
- Problems with "Windows Hello" when trying to add a fingerprint.
- Interference with Windows Defender, which may block certain applications or services.
How to change the diagnostic data settings?
- Open the Settings window, then select the Privacy and Security tab in the left pane and click Diagnostics and Feedback.
- Go to Send additional diagnostic data and set the switch to On.
- Then restart your computer.
