Updated July 2024: Stop getting error messages and slow down your system with our optimization tool. Get it now at this link
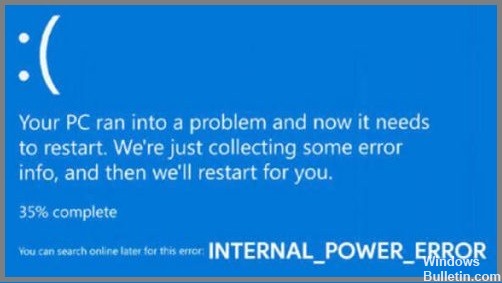
Although Windows 10 is very powerful, you may encounter BSODs with different shutdown codes. Internal power error is usually an exception BSOD (Blue Screen of Death), which can prevent further operation of your device. So if you are stuck with this “blue screen of death” error message, we are ready to rescue you.
In this article, we’ve covered some solutions that will allow you to fix the internal power error on your Windows 10 PC. If you also want to fix BSOD caused by other stop codes, we recommend you read some of our articles on this site.
What does “shutdown code: Internal Power Error” mean and what causes it?

The ‘Internal Power Error’ on your device is a constant loop that doesn’t leave you with many options for getting over this obstacle. There are several reasons that can cause a Windows 10 blue screen error, but an outdated or incompatible graphics card driver (especially AMD graphics drivers and AMD Catalyst Control Center.) on your PC is the most common cause of this internal_power_error BSOD. Your best bet is to try to find the appropriate graphics drivers, either by updating them or reinstalling them for your Windows PC.
How to fix ‘Internal Power Error’?
Update System Drivers

If your system is running with outdated drivers, blue screen interruptions may occur. Now we will update all system drivers and see if that solves the problem.
- Press the Windows + R key combination to open the “Run” dialog box.
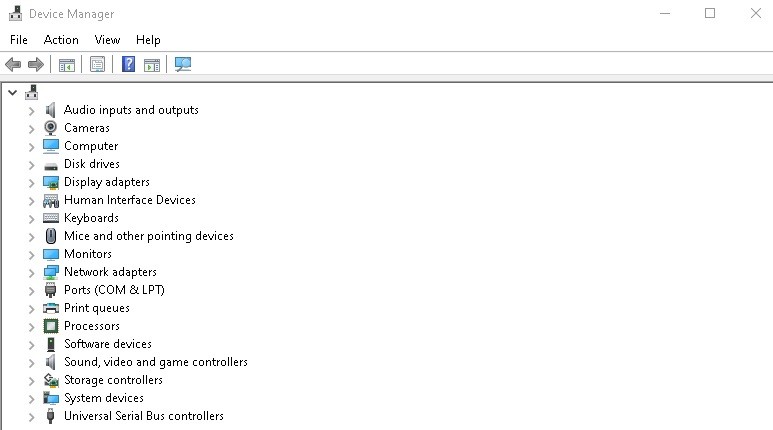
- Type “Devmgmt.msc” in the text box and press Enter to open the Device Manager.
- In the Device Manager window, look for the triangular exclamation points next to the option.
- If you find these icons, right-click on them and select the “Update Driver” option.
- Follow the wizard instructions on the screen to get the latest driver update from the Internet.
- Be sure to update all outdated/damaged system drivers listed in the Device Manager.
Removing the graphics driver
- First, open the Device Manager. You can do this by right-clicking the Start button and selecting “Device Manager” from the drop-down menu.
- Then, expand the “Display adapters” section.
- Next, find and right-click your graphics card driver. Then, select “Uninstall device” from the pop-up menu.
- After that, follow the prompts to uninstall the driver from your system.
- Finally, restart your computer for the changes to take effect.
After repeating the above steps, reboot the device if the stop code error persists. If not, install a fresh and updated copy of the graphics drivers from the manufacturer’s official website.
You can now prevent PC problems by using this tool, such as protecting you against file loss and malware. Additionally, it is a great way to optimize your computer for maximum performance. The program fixes common errors that might occur on Windows systems with ease - no need for hours of troubleshooting when you have the perfect solution at your fingertips:July 2024 Update:
Change the power settings
Windows 10 offers a variety of ways to change your power settings, depending on your needs. If you’re trying to improve your system’s performance, you can enable the High-Performance power plan. And if you want to strike a balance between battery life and performance, you can use the Balanced power plan. Here’s a quick overview of how to change your power settings in Windows 10:
- Go to Start > Settings > System.
- 2. Under “Power & sleep,” select “Additional power settings.”
- Select the power plan that you want to use.
- If you want to customize your power settings, select “Change plan settings.” Otherwise, skip to step 6.
- Make your changes and then select “Save changes.”
- Close the Settings window.
And that’s all there is to changing your power settings in Windows 10! Whether you’re looking to save battery life or boost performance, it only takes a few clicks to get the job done.
Increase the size of the hibernation file.
Many users report that the INTERNAL POWER ERROR error occurs because the hibernation file size is small, and the only solution is to make it bigger.
- Open the Windows search bar and type CMD.
- Select Command Prompt (Admin) from the menu.
- When the command prompt opens, type powercfg /hibernate /size 100 and press Enter.
By default, the hibernate file size is set to 75%. Sometimes this is not enough to cover your current memory needs, but you can easily change the size to 100% by following the instructions above.
Set the hard drive shutdown timer to 0
- Press Windows + S and type Power Options. Select Power Options from the list of results.
- When the Power Options window opens, locate the selected plan and click Change Plan Options.
- Click Change Advanced Power Options.
- Go to Hard Disk > Turn Off Hard Disk After and set it to 0. Click Apply and OK to save your changes.
Delete unwanted files
- Go to Search, type This Computer, and open This Computer.
- Right-click on your system drive (most likely C:) and choose Properties.
- Then click Clean Up Disk.
- Then go to the Clean Up System Files section.
- Now select whatever you want to clean.
- Click the OK button.
- Wait for the process to complete.
- Restart your computer.
Perform an SFC Scan
There are a few different ways to perform an SFC scan on Windows 10. Here are the steps for each method:
- Press the Windows key + X to open the Power User menu.
- Select Command Prompt (Admin) from the menu.
- Type the following command and press Enter: sfc /scannow
- The scan will take some time to complete, and you may see a message indicating that it is “verifying files” or “repairing corrupted files.”
- Once the scan is complete, you will see a report of any corrupted files that were found and repaired.
Expert Tip: This repair tool scans the repositories and replaces corrupt or missing files if none of these methods have worked. It works well in most cases where the problem is due to system corruption. This tool will also optimize your system to maximize performance. It can be downloaded by Clicking Here
Frequently Asked Questions
What does internal power error mean?
An internal power problem locks onto your device and does not leave you with many options to overcome this obstacle. This usually happens because of outdated/damaged drivers or when the system has created a too small hibernation file.
How do I fix stop code error?
- Reboot your computer.
- Run SFC and CHKDSK.
- Update to Windows 10.
What is a stop code problem?
A STOP code, often called an error check code, is a number that uniquely identifies a specific STOP (blue screen of death) error. Sometimes the safest thing a computer can do when a problem occurs is to shut down and reboot. When this happens, a STOP code is often displayed.
Why am I getting a stop code error?
A blue screen error (also called a shutdown error) can occur when a problem causes the device to suddenly shut down or reboot. You may see a blue screen indicating that the device has encountered a problem and needs to be rebooted.
