Updated July 2024: Stop getting error messages and slow down your system with our optimization tool. Get it now at this link
- Download and install the repair tool here.
- Let it scan your computer.
- The tool will then repair your computer.
If you’re seeing an error message It looks like Windows didn’t load correctly, it could mean one of several things. First off, there are a few reasons why a computer might display this error. For example, you might have accidentally deleted important files that Windows needs to run properly. Or maybe you’ve installed malware onto your device that’s causing problems. You can also encounter issues when installing certain software programs, such as drivers or games. In this article, we will learn about the cause of this error and how to deal with it.
What can be the cause of this error?
The most common reason why your computer did not start up properly is due to a corrupted master boot record (MBR). A corrupted MBR causes a “boot failure,” which usually leads to a blue screen of death (BSOD), or it might just display a black screen with some text like “Windows did not start.” If you’re seeing either one of those symptoms, then there is no way to fix your problem unless you’ve got access to another computer.
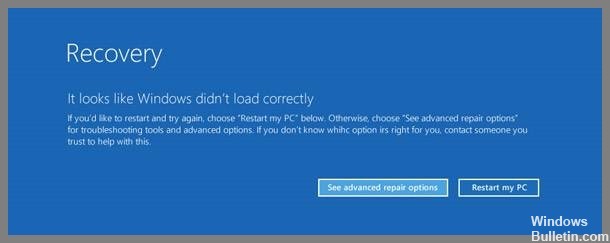
Restart your PC

In some cases, a simple restart fixes numerous issues within seconds. In others, there might be no fix at all. There are many reasons why a restart could help. Here are just a few:
If a bug is causing this error in Windows 11 or Windows10 PC, you may be capable of bypass it by restarting the machine. To restart your pc, you don’t need to use the physical reboot button. You can simply click on the Restart My Computer button displayed on the error screen. This will restart your computer instantly and allow you to log into your account.
July 2024 Update:
You can now prevent PC problems by using this tool, such as protecting you against file loss and malware. Additionally, it is a great way to optimize your computer for maximum performance. The program fixes common errors that might occur on Windows systems with ease - no need for hours of troubleshooting when you have the perfect solution at your fingertips:
- Step 1 : Download PC Repair & Optimizer Tool (Windows 10, 8, 7, XP, Vista – Microsoft Gold Certified).
- Step 2 : Click “Start Scan” to find Windows registry issues that could be causing PC problems.
- Step 3 : Click “Repair All” to fix all issues.
Resolve it in Safe Mode
The first thing that you must do when encountering problems in Windows is to boot into Safe Mode. It is a feature that allows you to start up Windows without loading drivers, programs, or anything else that could potentially interfere with the process. This way, you can check whether there is something wrong with those components. When you boot into Safe Mode, you can access the command prompt and use some commands to fix the problem. You can even disable certain features like Aero or DirectX.
If you cannot boot into Safe Mode, try pressing the F8 key during startup. This will allow you to select Advanced Boot Options. From here, you can choose Safe Mode. Otherwise, you can reboot and press the F8 key repeatedly until you see the option to select Safe Mode. You can also try disabling hardware acceleration, which might help you solve the issue. To do so, open Device Manager and look for the graphics card or video adapter. Right-click on it and go to Properties. Then, under Settings, uncheck Hardware Acceleration.
Use the system restore feature
If there are some corrupted system files, you must install the latest version of Microsoft Security Essentials to fix it. However, this method does not work unless you created a System Restore Point in the past. So, we recommend creating one and restoring your PC to the previous state.
You can do so by following the steps mentioned below:
- Boot your computer into Safe Mode. To do so, press F8 repeatedly while starting up your computer to see the options screen. Choose Safe mode and hit Enter.
- Once inside Safe Mode, open the Start menu and locate Control Panel. Open it.
- Click on Add/Remove Programs under Programs and Features.
- In the list of programs, look for Microsoft Security Essentials. Select it and click Remove.
- Wait for the program to finish uninstalling.
Launch the automatic Startup repair
If you are having problems getting into Windows 10, try running Automatic Startup Repair.
- You can do this by pressing the F8 key repeatedly while starting up your computer.
- If it doesn’t work, press the F10 key repeatedly.
- This will bring up a menu where you can select Safe Mode.
- Once you’ve selected Safe Mode, restart your PC normally.
- Type “Automatic Startup Repair”. Press Enter.
- Follow the instructions to fix whatever problem you’re having.
Rebuild the BCD
BCD stands for Boot Configuration Data, and it is one of the most critical files required to boot Windows 10. You cannot start Windows without having the BCD file present. If you lose this file, you won’t even be able to access Windows. In such cases, you can use the command prompt to rebuild the BCD file. Here we show you how to do that.
- Open the Start menu and type “command prompt”. This will open up the Command Prompt window.
- Now type “bcdedit /enumall”, and hit Enter. You will see the list of all partitions.
- Select the partition where Windows is installed and press Enter.
- Type “bootcfg /rebuild {drive letter}”. Replace “{drive letter}” with the name of your hard disk. Press Enter.
- Wait for a while. Once the process completes, restart your PC and check whether your BCD file is working fine.
Start the CHKDSK
If you’re having trouble loading Windows 10, it could be because you don’t have enough free space on your hard drive. Windows needs about 20GB of free space to load properly. If you’ve been running out of space lately, here are some tips to fix this problem.
- Check Disk Health: The Disk Cleanup tool lets you delete old files and empty temporary folders. You’ll find it under Start | All Programs | Accessories | System Tools.
- Delete Temporary Files: You can use the Recycle Bin to delete temporary files, but there’s no guarantee that everything gets deleted. Instead, you can run the Disk Cleanup tool to permanently delete those files.
- Free Up Space: To make sure you have enough space available, right-click on My Computer or C:\ and choose Properties. Then, go to the Storage tab.
Launch the SFC (System File Checker) scan
If you’re having trouble opening files or folders, or even if some programs aren’t working properly, there could be a simple solution. To find out what’s wrong, we suggest trying our free tool called SFC (System FileChecker), which scans your computer for problems and fixes them automatically. You don’t need to know anything about computers to run SFC; just download and install it—it takes less than five minutes. Once installed, open it up and follow the prompts.
Perform a clean install of Windows OS
If you are stuck in the middle of a Windows 10 upgrade and it won’t boot up properly, there is a solution for you. If you do a clean install of Windows 10, you’ll be able to start over without losing anything important. Here’s what you need to do:
- Download a copy of the Windows 10 ISO file.
- Create a USB flash drive or DVD disc.
- Insert the USB flash drive into your computer and restart it.
- Select the “Try Windows” option from the menu.
- When prompted, select “Install now.”
- Wait while Windows installs itself onto your hard disk.
- After installation, reboot your computer.
- Your computer should now be ready to work as usual.
Note: Make sure you back up your data before doing a clean install.
Expert Tip: This repair tool scans the repositories and replaces corrupt or missing files if none of these methods have worked. It works well in most cases where the problem is due to system corruption. This tool will also optimize your system to maximize performance. It can be downloaded by Clicking Here
Frequently Asked Questions
Why does my computer say 'Windows didnt load correctly'?
If your PC displays "It looks like Windows didnt load correctly" it could mean one of the following reasons:
- There might be some corruption issues in the registry.
- Your hard disk may be damaged.
- You might have installed too many programs.
- Some of your important data might be missing.
- There might be a problem with the operating system itself.
- You may have accidentally deleted something vital.
What causes your computer not to start correctly?
Windows doesn’t start up properly due to some common problems that you might face. These include:
- BCD is missing: BCD stands for Boot Configuration Data. It stores information about the operating system and hardware configuration. If you don’t have it, you won’t be able to boot into Windows. You’ll see a blue screen of death or BSOD.
- BCD is corrupted: This happens when there are problems with the BCD data. A corrupted BCD can cause the computer to stop working altogether.
- File system integrity compromised: The file system itself may become corrupted or damaged. This includes files like the registry, NTFS, FAT32, etc.
How do you resolve the 'It looks like Windows didn't load correctly'?
To resolve the "It looks like Windows didnt load correctly." error, you need to try repairing the boot configuration data (BCD). You can do this by pressing the F8 key repeatedly during startup. If this doesn't help, you can restore the system to an earlier date/time using the System Restore feature. This way, you'll make sure that there are no corrupted files on your hard disk.
