Updated February 2025: Stop getting error messages and slow down your system with our optimization tool. Get it now at this link
In the case of network problems, ping can help solve the underlying problem. On a Windows computer, we use the ping command to measure the response time of an IP address and to analyze, in particular, the statistics of the responses received. When you execute the ping command, packets of information are sent to devices on the same network or on the Internet to check if they are available to connect.
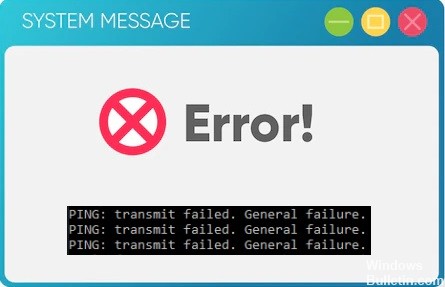
But what if you send a ping and get an error message “Ping: Transmit Failed. General Failure.”? This can be quite frustrating, especially if you’re working on something. The problem is exacerbated by the fact that the notification does not contain any additional information about the error.
In this article, we’ll show you how to fix the ping error so that you can get back to your work.
What does ‘Ping: Transmit Failed. General Failure.’ mean?

A ping is a valuable tool for solving all kinds of network or Internet problems. The ping command sends packets of information to devices on the network or Internet to see if they are available to connect. On Windows computers, the error message “Ping: Transmit Failed. General Failure.” message appears if the correct Internet protocol is not selected on the computer.
The ping response displays the results for each packet returned in four separate lines and indicates the processing time in milliseconds. It also displays a summary of lost packets, with the fastest, slowest, and average times. If the destination does not respond, “Request Timed Out” is displayed on each line. If the computer does not have the correct TCP/IP settings, the message “Ping: Transmit Failed. General Failure.” This indicates that you have the wrong TCP/IP settings.
What causes the ‘Ping: Transmit Failed. General Failure.’ error?
One of the main reasons for the “PING: Transmission Failed General Failure” error is incorrect TCP/IP and DNS settings. Improper firewall configuration and network card driver problems can also be caused.
- Faulty TCP/IP set: If you have a static IP address, make sure it is entered correctly in your network settings. If you have a dynamic IP address, check that the DHCP server is running and that your computer is connected to the network.
- Improperly configured firewall: If you have a firewall enabled on your computer, make sure it is properly configured and that it does not block any of the ports or addresses needed for successful pinging.
- Other software or hardware bugs: In some cases, the error can be caused by a problem with the network card driver or other software on your computer. Try updating the driver or reinstalling the software to see if that solves the problem.
- Problems with DNS or other sockets: If you are using a DNS server, make sure it is configured correctly. You can also try to use another DNS server or flush the DNS cache on your computer.
- Outdated network drivers or firmware: In some cases, the error can be caused by outdated network drivers or firmware. Try updating the driver or firmware to see if that fixes the problem.
As mentioned above, the root cause of this error is unknown. The following are the most effective solutions to fix the “Ping General Failure” error. These solutions have worked for other users and are worth trying on your computer.
You can now prevent PC problems by using this tool, such as protecting you against file loss and malware. Additionally, it is a great way to optimize your computer for maximum performance. The program fixes common errors that might occur on Windows systems with ease - no need for hours of troubleshooting when you have the perfect solution at your fingertips:February 2025 Update:
How do I fix the “Ping: Transmit Failed. General Failure.” error message?
Flush your computer’s DNS

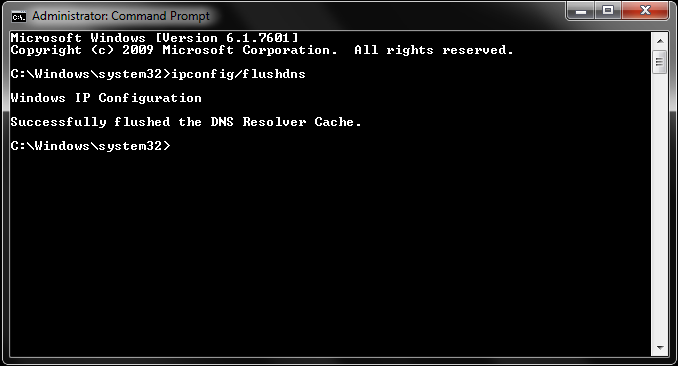
One solution that has proven to be extremely effective for many users affected by this problem, and has restored their computer’s ability to successfully ping commands, is to clean your computer’s DNS. Cleaning your computer’s DNS is not only a fairly safe method of solving this problem, but it is also good for the health of your computer in general. To clean your computer’s DNS, follow these steps:
- Open the Start menu.
- Search for the word “powershell”.
- Right-click on the “Windows PowerShell” search result and click Run as administrator.
- Sequentially type each of the following commands in the Windows PowerShell extended instance and press Enter when you’re done:
- ipconfig/release
- ipconfig/renew
- ipconfig/flushdns
- netsh int reset ip c:\tcp.txt
- netsh winsock reset
- Close Windows PowerShell and restart the computer.
- After restarting the computer, check to see if the problem has been resolved or not.
Disable all IPv6-IPv4 transition technologies
If you have enabled any type of IPv6 transition or tunneling technology on your computer, this could be the cause of all your problems. Fortunately, simply disabling all IPv6-IPv4 transition technologies should solve the problem.
- Open the Start menu.
- Search for the word “cmd”.
- Right-click on the search result “cmd” and select Run as administrator.
- Enter the following commands sequentially at the extended command prompt and press the Enter key after each command:
- netsh int ipv6 isatap set state disabled
- netsh int ipv6 6to4 set state disabled
- netsh interface teredo set state disable
- Close the extended command line.
- Reboot your computer.
- See if the problem persists when the computer starts up.
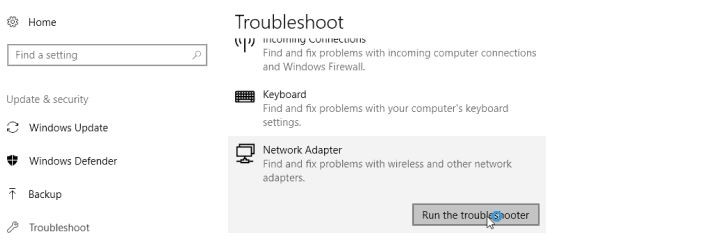
Run the network adapter troubleshooter

Running the network adapter troubleshooter can help identify and, if possible, resolve network-related problems. Try the following procedure to troubleshoot the problem.
- Go to Start > Settings > Network & Internet.
- Under “Status,” click the network you want to troubleshoot.
- Under “Advanced Options,” click Network Adapter Troubleshooter.
- Follow the instructions on the screen.
- Once the troubleshooter is finished, restart your computer and see if the problem is fixed.
Performing a network reset
If you’re experiencing network issues in Windows PC, one of the first things you should try is performing a network reset. This will reset your network settings to their default values, which can often fix connectivity problems. Here’s how to do it:
- Open the Settings app by clicking on the Start menu and then selecting the gear icon.
- Click on “Network & Internet.”
- In the left-hand menu, select “Status.”
- Under “Network reset,” click on the “Reset now” button.
- Confirm that you want to reset your network settings by clicking on the “Reset” button.
After completing these steps, your network settings will be back to their defaults, and you should start seeing improvements in your connectivity. If you’re still having trouble, you may need to contact your ISP or make some further changes to your settings. But in most cases, a simple network reset will do the trick..
Updating network drivers

Updating your network drivers on Windows PC is a critical step in keeping your computer running smoothly. By ensuring that you have the latest drivers installed, you can help to prevent problems with compatibility and improve the overall performance of your system. Here are the simple steps to follow in order to update your network drivers:
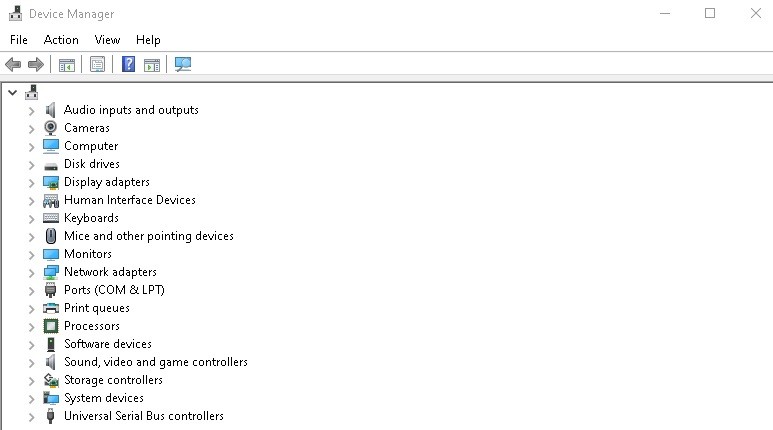
- Open the Device Manager by right-clicking on the Start Menu and selecting “Device Manager” from the list of options.
- Expand the “Network Adapters” section by clicking on the arrow to the left of it.
- Right-click on your network adapter and select “Update Driver Software” from the menu that appears.
- Choose “Search automatically for updated driver software” from the next screen that appears. Windows will now search for and install any available updates for your network drivers.
- Once the process is complete, restart your computer for the changes to take effect.
By following these simple steps, you can keep your network drivers up-to-date and help ensure that your computer runs smoothly.
Expert Tip: This repair tool scans the repositories and replaces corrupt or missing files if none of these methods have worked. It works well in most cases where the problem is due to system corruption. This tool will also optimize your system to maximize performance. It can be downloaded by Clicking Here
Frequently Asked Questions
How do I fix ping transmit failed general failure?
- Troubleshoot the network adapters.
- Clean up a corrupt DNS cache.
- Configure Windows to accept IPv4 instead of IPv6.
- Remove all applications that interrupt HTTP traffic.
- Turn off all IPv4 or IPv6 transition technologies.
- Reset the computer's TCP/IP protocol.
How do you fix general failure?
- Turn off all IPv6-IPv4 transition technologies.
- Remove all applications that block HTTP traffic in any way.
- Configure Windows to prefer IPv4 over IPv6 in prefix policies.
What does general failure mean in a ping test?
The "ping general failure" error occurs when you run ping commands on the command line to check the response time of an IP address. The cause of this problem is currently unclear since there is no explanation for the "ping transmit failed" general error in the command line interface.
How do you troubleshoot ping?
The first step in troubleshooting the problem with ping is to simply try to ping the remote host. Remember that not all devices are configured to respond to a ping request, so make sure that the device you want to ping can respond.
