Updated February 2025: Stop getting error messages and slow down your system with our optimization tool. Get it now at this link
- Download and install the repair tool here.
- Let it scan your computer.
- The tool will then repair your computer.
Error 0x80042407 is displayed during system restore process. This happens when the media has been created on computer A and is used on computer B (same model as computer A).

This problem occurs in most cases when users try to use Windows repair or installation disks to restore the system image backup to another hard disk or computer with different hardware. If you are one of the victims, you can follow these troubleshooting steps to solve the problem.
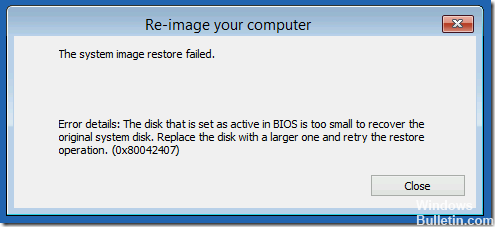
The error looks similar to this:
The Windows Complete PC Restore operation failed.
Error details: The disk that is set as active in BIOS is too small to recover the original system disk. Replace the disk with a larger one and retry the restore operation. (0x80042407)
Make sure that the source and target computers use the same mode.
If you want to restore to a new hard disk, make sure that the disk is at least as large as the one containing the backed up volumes, regardless of the size of those volumes. For example, if there is only one 100GB disk on a 1TB disk during backup, we must use a disk of at least 1TB for recovery.
If you are restoring only the operating system, make sure you have a backup containing at least the critical disks on the server. If you are restoring the entire server, make sure you have a backup containing all the disks on the server. To perform a bare metal recovery, make sure you have enabled a backup for a bare metal recovery (or a full server recovery).
Running a restore from the command line

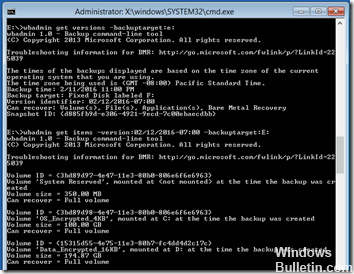
Follow the steps above to get a prompt. In this case, the external USB key containing the backup to be restored is located on drive E:. We are restoring the last backup of February 12.
Note that the names of wbadmin parameters are preceded by dashes. Even if a command breaks two lines below, enter it on one line.
Retrieve the backup version, then the item details from the destination:
wbadmin get versions -backuptarget:E:
wbadmin get items -version:02/12/2016-07:00 -backuptarget:E:
Recreate the first two volumes listed as “items” (ignore Applications and Components). In this case, we want a 350MB System Reserved partition and a 100GB C: partition:
February 2025 Update:
You can now prevent PC problems by using this tool, such as protecting you against file loss and malware. Additionally, it is a great way to optimize your computer for maximum performance. The program fixes common errors that might occur on Windows systems with ease - no need for hours of troubleshooting when you have the perfect solution at your fingertips:
- Step 1 : Download PC Repair & Optimizer Tool (Windows 10, 8, 7, XP, Vista – Microsoft Gold Certified).
- Step 2 : Click “Start Scan” to find Windows registry issues that could be causing PC problems.
- Step 3 : Click “Repair All” to fix all issues.
diskpart
list disk
select disk 0
create par primary size=350
format fs=ntfs quick label=”System Reserved”
assign letter=B (temporary letter so we can target during recovery)
active (note that we make System Reserved the Active partition)
create par primary size=102400 (that’s 100GB)
format fs=ntfs quick label=”OS_Encrypted_4KB”
assign letter=C
detail disk
exit
Restore the System Reserved and C: volumes. System Reserved doesn’t have a drive letter on the backup media, so you must use the peculiar volume ID syntax. The ID itself comes from the wbadmin get items command above, but be sure to preface it with \\?\Volume and add a trailing backslash:
wbadmin start recovery -version:02/12/2016-07:00 -backuptarget:E: -itemType:Volume -items:\\?\Volume{3bd89d97-4e47-11e3-80b0-806e6f6e6963}\ -recoverytarget:B:
diskpart
list disk
select disk 0
select par 1
remove letter=B (remove temporary drive letter from System Reserved partition) detail disk
exit
wbadmin start recovery –version:02/12/2016-07:00 -backuptarget:E -itemType:Volume –items:C: -recoverytarget:C:
Run the System File Checker utility.

If the problem persists, you can run the System File Checker (SFC) utility. This convenient integrated tool checks your file system.
- Click on Start and start typing “cmd” on your keyboard.
- cmd should appear with a black icon in your search results.
- Right-click on it and select Run as administrator.
- When prompted to enter the administrator password, enter the password and click OK.
- A new all-black window opens. You can enter commands directly in this window.
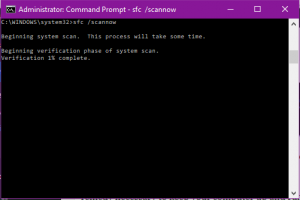
- Enter sfc/scannow and press Enter.
- This process will take a long time. You can reduce and modify these black windows.
After a while, return to the black window and check that the process is complete.
Once the SFC process is complete, restart your computer. After restarting, check for updates again.
https://support.hp.com/us-en/document/c04921080
Expert Tip: This repair tool scans the repositories and replaces corrupt or missing files if none of these methods have worked. It works well in most cases where the problem is due to system corruption. This tool will also optimize your system to maximize performance. It can be downloaded by Clicking Here
