Windows

The Boot Configuration Data for Your PC Is Missing (0xc0000034 0x0000098)

The error “The Boot Configuration Data for Your PC Is Missing”, as indicated by codes like 0xc0000034 or 0x0000098, occurs when necessary information is missing or damaged in the boot configuration data (BCD) file.

Creating Windows Installation Media

To begin repairing the Boot Configuration Data (BCD), you first need a Windows installation media. This can be either a DVD or a USB drive. You can create this by downloading the Windows Media Creation Tool from the official Microsoft website and following the instructions to create bootable media. read more

Windows

How To View and Troubleshoot Hidden Files & Folders in Windows

To view hidden files and folders in the latest versions of Windows, including Windows 11 and Windows 10, follow these instructions:

Viewing Hidden Files in Windows 11 and Windows 10

To view hidden files and folders in Windows 11 and Windows 10, you can follow these steps:

  1. Open File Explorer:
    • Click on the File Explorer icon on the taskbar or press Windows key + E.
  2. Show Hidden Items in Windows 11:
    • Select View from the menu at the top of the window.
    • Click on Show to expand the options.
    • Check Hidden items to display hidden files and folders.
  3. Show Hidden Items in Windows 10:
    • Select the View tab on the ribbon at the top of the File Explorer window.
    • Click on Options to open Folder Options.
    • In the Folder Options window, switch to the View tab.
    • Under Advanced settings, find and select the option labeled Show hidden files, folders, and drives.
    • Click OK to apply the changes and close the Folder Options window.

Note: Hidden files and folders will now be visible in File Explorer, but they will appear slightly faded compared to regular files. This indicates their hidden status.

Viewing Hidden Files in Windows 8.1

To access hidden files and folders in Windows 8.1, follow these instructions:

  1. Access the Search Function:
    • If using a touchscreen, swipe in from the right edge of the screen, then select Search.
    • If using a mouse, point to the upper-right corner of the screen, move the mouse pointer down, and then select Search.
  2. Search for Folder Options:
    • Type “folder” in the search box.
    • Select Folder Options from the search results.
  3. Modify View Settings:
    • In the Folder Options window, navigate to the View tab.
    • Under Advanced settings, select the option Show hidden files, folders, and drives.
    • Click OK to apply the changes.

Viewing Hidden Files in Windows 7

For users operating on Windows 7, the process to view hidden files is as follows: read more
Windows

Sound and Audio does not work after Windows Update

To resolve sound issues after a Windows 10 update, you can follow these updated steps:

1. Use the Windows Audio Troubleshooter

This tool automatically detects and fixes audio problems. It can be accessed in two ways:

  1. Through Sound Settings:
    1. Open Settings on Windows 10.
    2. Click on System.
    3. Click on Sound.
    4. Under the “Output” section, click the Troubleshoot button.
    5. Follow the on-screen directions to fix the audio issue.
    Through the Troubleshoot Page:
    1. Open Settings.
    2. Click on Update & Security.
    3. Click on Troubleshoot.
    4. Under the “Get up and running” section, select the Playing Audio option.
    5. Click the Run the troubleshooter button.
    6. Continue with the on-screen directions.

    2. Check and Set Default Audio Device

    Ensure your audio device is set as the default device, especially if using USB or HDMI audio devices:

    1. Right-click the speaker icon in the notification area.
    2. Select ‘Sounds’ and then the ‘Playback’ tab.
    3. Identify your audio device in the list. If it’s not set as the default, you will not see a green checkmark next to it.
    4. Right-click the desired device and select ‘Set as Default Device’.
    5. Click ‘Apply’ and then ‘OK’ to confirm.
    6. Restart your computer and check if the sound issue is resolved.

    3. Uninstall and Reinstall Audio Drivers

    If the sound issue persists, your sound drivers might need reinstallation:

    1. Uninstalling the Audio Driver:
      1. Open the Device Manager.
      2. Navigate to ‘Sound, video and game controllers’.
      3. Right-click on your sound device and select ‘Uninstall device’.
      4. Follow the prompts to uninstall and restart your computer.
      Reinstalling the Audio Driver:
      1. Upon restart, Windows should attempt to reinstall the audio driver automatically.
      2. If Windows does not reinstall the driver, visit the manufacturer’s website to download and install the latest driver manually.

      4. Update Audio Drivers

      Keeping audio drivers up-to-date is crucial for resolving sound issues:

      1. Manual Update:
        1. Open Device Manager from the Start menu.
        2. Expand ‘Sound, video and game controllers’.
        3. Right-click on your audio device and select ‘Update driver’.
        4. Choose ‘Search automatically for updated driver software’ and follow the instructions.
        Automatic Update:Use a driver updater tool to automatically find and install the latest drivers.

        5. Restart Audio Services

        Restarting certain Windows services can resolve audio issues:

        1. Press Windows logo + R keys to open the Run Dialog box.
        2. Type ‘services.msc’ and press Enter.
        3. In the services list, find ‘Windows Audio’, ‘Windows Audio Endpoint Builder’, and ‘Remote Procedure Call (RPC)’.
        4. Right-click each service and choose ‘Restart’.
        5. After restarting these services, check if the sound issue is resolved.

        6. Use Different Audio Formats

        Changing the audio format can sometimes resolve compatibility issues: read more

Windows

Peer-to-Peer Networks (P2P) and File Sharing

There are two types of computer networks. One of them is the client-server model , where all computers are connected to a server computer that facilitates file sharing. The other type of computer network is Peer to Peer to Peer. Peer-to-peer means the absence of a dedicated server. As their name suggests, they are connected as peers – directly to each other instead of having to connect to a server.

Peer-to-peer (P2P) networks have evolved significantly over the years, adapting to technological advancements and changing user needs. Here’s a comprehensive overview, integrating the latest developments and best practices in P2P networking. read more

Windows

Solutions for Stuck or Stalled Windows Updates

When dealing with Windows Update issues, such as getting stuck or stopping, there are several solutions you can try. These methods apply to both Windows 10 and Windows 11 and are designed to address common problems that might cause updates to fail.

1. Give It Time

When you initiate a Windows Update, it’s common for the process to take some time. This is particularly true for large updates, such as feature updates that occur twice a year. These updates not only bring new features but also include important security patches and bug fixes. Therefore, it’s crucial to allow sufficient time for these updates to download and install. read more

Windows

Accessing and Customizing the Windows On-Screen Keyboard

The On-Screen Keyboard (OSK or osk.exe) in Windows is a versatile and customizable tool that offers an alternative to the physical keyboard, particularly useful for users with mobility or vision impairments, or in scenarios where a physical keyboard is not available or practical. Here’s an updated guide on how to use and customize the OSK in Windows.

Windows on-screen keyboard

Accessing the On-Screen Keyboard

The On-Screen Keyboard (OSK) in Windows can be accessed in several ways, depending on the version of Windows you are using:

  • Windows 11 and Windows 10:
    • Go to the Start menu.
    • Select Settings.
    • Navigate to Accessibility (Ease of Access in Windows 10).
    • Choose Keyboard and turn on the On-Screen Keyboard toggle.
    Windows 8.1:
    • Access via Charms.
    • Go to PC Settings.
    • Select the Ease of Access panel.
    • Move the slider to turn on the On-Screen Keyboard.
    Shortcut Method:Press Win + Ctrl + O to open the OSK in both Windows 11 and 10. Sign-In Screen:
    • Click the Ease of Access button on the sign-in screen.
    • Select On-Screen Keyboard.

    Customizing the On-Screen Keyboard

    The OSK offers various customization options to enhance your experience: read more

Windows

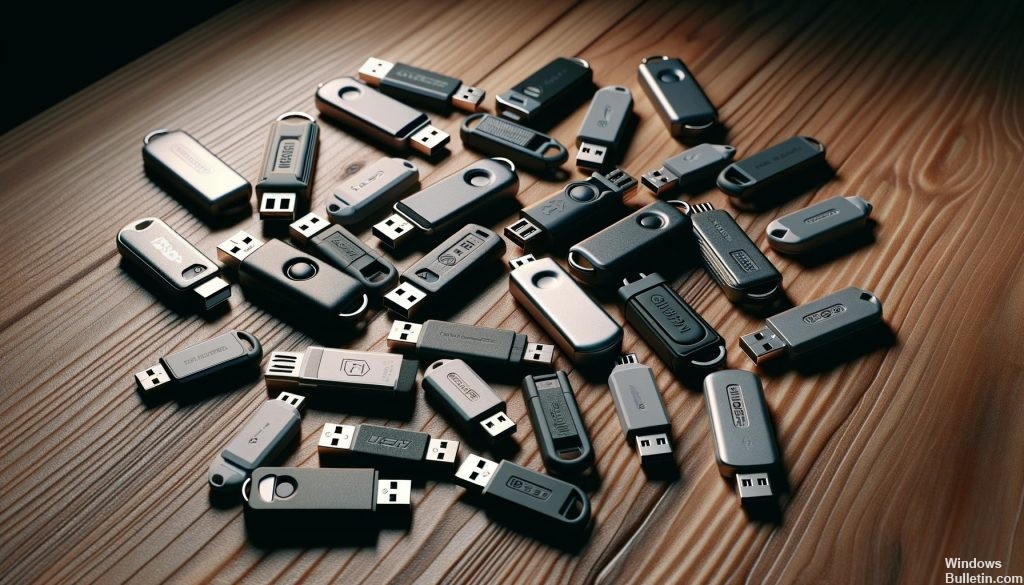
Ejecting and Remounting USB Drives in Windows (without physical reconnection)

To manage USB drives in Windows, including ejecting and remounting them, there are several methods you can use.

Ejecting USB Drives

To safely remove a USB drive in Windows, follow these steps:

Use the Safely Remove Hardware Icon

  • Locate the icon on the taskbar. If it’s not visible, select “Show hidden icons”.
  • Right-click on the icon and choose the hardware you want to remove.
  • If the icon isn’t there, right-click on the taskbar and select “Taskbar settings”.
  • Under “Taskbar corner overflow”, find “Windows Explorer: Safely Remove Hardware and Eject Media” and enable it.
  • read more

    Windows

    Fix The “USB device not recognized” error in Windows 11/10

    If you’re encountering the “USB device not recognized” error on Windows 10, there are several methods you can try to resolve the issue:

    1. Run the Hardware and Devices Troubleshooter

    Windows has a built-in tool to troubleshoot and fix issues with hardware and connected devices. To use the Hardware and Devices Troubleshooter:

    1. Press Windows Key + S to open the search bar.
    2. Type Command Prompt in the search bar and open it.
    3. In the Command Prompt, type msdt.exe -id DeviceDiagnostic and press Enter.
    4. The troubleshooter will open. Follow the on-screen instructions to detect and fix issues.

    2. Uninstall and Reinstall USB Controller Drivers

    Problems with USB Controller Drivers can cause the USB device to be unrecognized. To resolve this:

    1. Press the Windows logo key + Pause to open System Properties.
    2. Click on Device Manager.
    3. Double-click Universal Serial Bus controllers to expand the list.
    4. For each USB controller:
      1. Right-click and select Uninstall device.
      2. Confirm any prompts to uninstall the driver.
      Restart your computer to allow Windows to automatically reinstall the drivers.

      3. Update USB Device and Motherboard Chipset Drivers

      Outdated or corrupted drivers can cause recognition issues. To update drivers:

      • Manual Update:
        1. Visit the manufacturer’s website for your USB device and motherboard.
        2. Search for the latest drivers compatible with your Windows version.
        3. Download and install these drivers following the provided instructions.
      • Automatic Update:
        1. Use a driver update tool like Driver Easy or Win Riser software.
        2. Download and install the software.
        3. Run the software and it will automatically detect and update your drivers.

      4. Disable USB Selective Suspend Feature

      This feature helps conserve power but can sometimes cause USB devices to be unrecognized. To disable it: read more

    Windows

    Uninstalling Pre-Installed Windows Apps and Games

    Uninstalling pre-installed applications and games on Windows 10 and Windows 11 can be done through several methods. Each method has its unique steps and uses.

    Uninstalling via Windows Settings

    Windows Settings provides a user-friendly interface to uninstall apps and games. Here’s how to do it in both Windows 10 and Windows 11:

    Windows 11

    1. Open Settings by pressing Win + I or searching for it in the Start Menu.
    2. Navigate to Apps > Apps and features.
    3. Scroll through the list or use the search box to find the app or game you want to uninstall.
    4. Click on the three vertical dots next to the app’s name.
    5. Select Uninstall and confirm your choice.

    Windows 10

    1. Press Win + I to open Settings.
    2. Go to Apps > Apps & features.
    3. Find the app you wish to remove from the list of installed apps.
    4. Click on the app, and then select Uninstall.
    5. Confirm your decision by clicking Uninstall again in the prompt.

    Note: Some built-in apps such as Calculator or Camera might not offer an uninstall option.

    Using PowerShell

    For more control and the ability to uninstall certain system apps, PowerShell is a powerful tool. Remember to run PowerShell as an administrator. read more

    Windows

    Free up space on your hard drive via Windows 10 Settings

    To free up space on your Windows 10 hard disk, you can follow these updated steps:

    1. Using External Storage Devices

    External storage devices provide an easy way to free up space on your computer’s hard disk. Follow these steps to move files to an external device:

    1. Connect the Device: Plug in your USB drive or SD card to your PC.
    2. Open File Explorer: Click on the File Explorer icon on the taskbar.
    3. Select Files: Navigate to the folder containing the files you wish to move.
    4. Transfer Files:
      1. Select the files you want to move.
      2. Right-click and choose ‘Cut’ from the context menu.
      3. Navigate to your external device in File Explorer.
      4. Right-click and select ‘Paste’ to move the files.
      Verify Transfer: Ensure all files have been successfully transferred to the external device.

      2. Changing Default Save Locations

      To prevent your primary drive from filling up, you can set new files to automatically save to another drive with more free space:

      1. Access Storage Settings: Click on Start, then go to Settings > System > Storage.
      2. Advanced Storage Settings: Select ‘Advanced storage settings’ and then ‘Where new content is saved’.
      3. Set New Locations: For each type of content (apps, documents, music, photos, etc.), choose a different drive from the drop-down menu.
      4. Confirm Changes: Make sure the changes are saved correctly.

      3. Enabling OneDrive Files On-Demand

      OneDrive Files On-Demand helps save space on your hard disk by keeping smaller placeholder files on your PC and storing the full-size files in the cloud: read more

    Scroll to Top