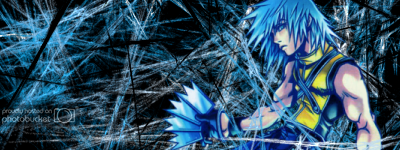
This tutorial introduces you to the “Dynamic Flame” method. The name comes from our extensive use of the Flame Filter.
** Note: This guide doesn’t incorporate layer techniques as it was created before I learned about layers. Nonetheless, feel free to experiment and enhance this method.
Creating a Vibrant Banner –
1. Start by opening a new document (I’m using 400×150 pixels).
2. Fill your canvas with a solid black background.

3. Change the background color to white and choose a preferred foreground color for your banner’s theme (my choice is blue).
4. Let’s begin using the Flame effect. Access it by right-clicking and navigating to Filters > Render > Nature > Flame. You can detach the Flame menu into a separate window for easier access.
5. In the Flame settings, go to Edit. I suggest setting the variation to Linear, but feel free to explore. Click ‘Randomize’ until you find a flame pattern you like.

6. Once you’re happy with a flame, confirm it. Then, in the Camera tab, adjust its position as desired.
7. Repeat steps 5 and 6 until you’ve filled your canvas with the desired amount of flames.

7.5. [Optional] – To achieve a more uniform color background, use Tools > Color Tools > Colorize. Adjust to a hue that complements your primary color.

8. Add depth with black flames. Set both colors to white, select your flame, then change the colors to black before placing the flame.

** Note: Experiment with white flames for different effects.
9. Revert to your original color scheme and add a few more flames for texture.

10. Continue adding flames to enhance depth and complexity.

11. Time to add your chosen image or render. Adjust its color to match your background’s dominant hue using the Gradient Tool set to Overlay and Linear Shape.
12. Apply the gradient to your image as needed.
13. Place your image onto your background.

14. Integrate your image seamlessly by adding more flames over it, blending it with the background.
Main color version

Black version

15. Create a border using the Rectangle Select Tool with Feather Edges enabled. Invert the selection and fill with black.

16. Finally, add your text. Here’s my simple white text example:
Congratulations! You’ve creatively utilized one of Gimp’s many features.
Please share your creations 🙂
