oday, we will create a splattered vector and photography mash up based on a Photoshop tutorial by James Davies at PSDTuts. We will be using mainly the paths tool, along with the dodge and burn tools. Let’s get started!
I’ve always liked mixing cartoons and vectors with photography. It is a great way to make a fun and colorful style of art. Many projects use this form from gig posters and CD artwork to high-end advertising imagery.
Step 1
First thing’s first. Head on over to stock.xchng and download this photo of a gun. Create a new document in Gimp at a rather large size. I made mine 1280×800 so that I can set it as my desktop background. Open up the gun photo as a new layer. Rename the layer “gun.” Cut the gun (and hand) out of the background. I prefer using the paths tool to do this.

Step 2
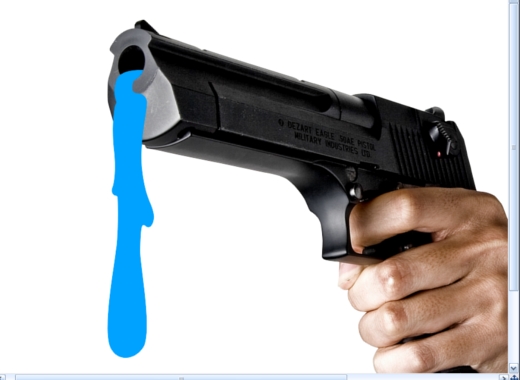
Create a new layer above the gun layer and name it “Gun Goo.” Get out the paths tool. You will need to draw a sort of dribble coming out of the barrel of the gun. Be sure that the goo follows the contour of the gun. When finished, hit the Selection from Path button. Fill the new selection with a light blue color. I used #00a2ff. Deselect.

Step 3
Before we go any further, download these filters as we will be needing them for this next step. Atfter you have them installed, go to Filters > Script-Fu > Refresh Scripts. You should see a new menu pop up that reads “Script-Fu.” Now let’s add some depth to the “vector” goo.
Select the “gun goo” layer and go to Script-Fu > Layer Effects > Inner Glow. Use #9fdcff for the color, 60% for the opacity, screen for the blending mode, edge for the source, 0.0 for the choke, and 20 for the size. Click ok.

Step 4
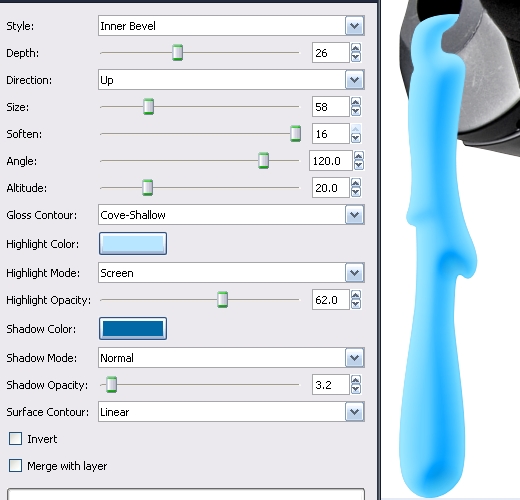
Select the “gun goo” layer and go to Script-Fu > Layer Effects > Bevel and Emboss. Use the settings shown in the picture below. Hit ok when done. Select the “gun goo” layer. Right click > Alpha to Selection. Select > Inverse. SSelect the “gun goo” layer. Right click > Alpha to Selection. Select > Inverse. Select the “gun goo-highlight” layer and hit delete on the keyboard. Do this again with the “gun goo-shadow” layer.

Step 5
Select the “gun goo” layer again and go to Script-Fu > Layer Effects > Satin. Use the settings shown below. Hit ok. Select the “gun goo” layer. Right click > Alpha to Selection. Select > Inverse. Select the “gun goo-satin” layer and hit delete on the keyboard.

Step 6
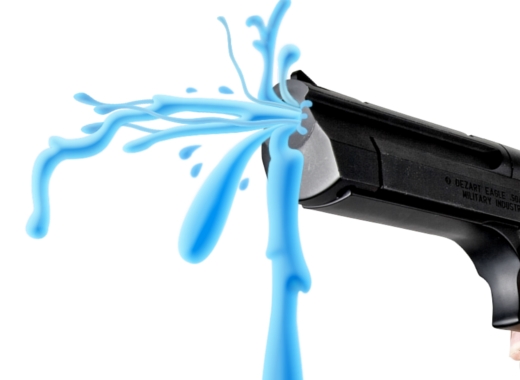
Go ahead hide the gun and background layers. Right click one of the remaining layers and hit Merge Visible. Click ok. Rename the new layer “Gun Goo.” Unhide the gun and background layers. Create a new layer. Draw more goo and dribbles like we did before. Color and give them depth just as we did before. Mess around with the settings if you need to.

Step 7
Continue to add more goo splatters. Hide all the layers that ARE NOT a part of the goo. Right click on one of the goo layers and select “merge visible layers.” Rename the new layer to “gun goo.”

Step 8
We need to add drop shadows behind the droplets that are near the gun. Create a new layer above the gun layer and name it “gun goo shadow.” Fill the entire layer with black. Right click the layer and select “add layer mask.” Pick the black (full transparency) mask. Get out a white, soft brush and color in the shadow behind the droplets near the gun. Remember, black “erases” what’s on the mask and white “paints on” what is on the mask.

Step 9
Download this photo of a grenade from stock.xchng. Open it up as a new layer named “grenade 1.” Scale and cut out the grenade from the background. Put the grenade 1 layer behind the gun layer. Rotate it like I have below.

Step 10
Using the paths tool, draw a path around a section of the grenade. There is no need to worry about the outer edges of the grenade since you already rendered it. Turn the path into a selection and then cut/paste onto a new layer named “grenade 1 piece.” Keep doing this, renaming the layers “grenade piece 2,” “grenade piece 3,” and so on. You can go as detailed as you want with this. Once you have all the pieces cut out, spread them out as if blown apart.

Step 11
Create a new layer and, using the paths tool, draw smoke around the grenade. You can use multiple colors to indicated different shades of gray of smoke. Be sure to draw the smoke on different layers depending on where the smoke will be located.

Step 12
Use the same layer effects we used earlier on the goo to give the smoke a more “3d vector” look. Be sure to change the highlight and shadow colors to light and dark grays. You may have to experiment with different opacities to get the bevel just right.

Step 13
Now we’ll draw cartoony lines around the smoke to give it more impact and to keep it looking fun. Use the paths tool and outline the smoke layers. Convert the strokes to paths and then go to Edit > Stoke and stroke it in black with a width of 2 pixels. The reason we are not doing this by using Alpha to Selection is because that tool does not give a clear outline when stroked. After you are done with that, give each of the smoke clouds a slight shadow if they are over the grenade. Do this similar to the way that we added shadows to the goo over the gun.

Step 14
The grenade needs goo coming out of it for more of an impact. Draw some in like we did before with the gun. Use the same effects on it that we did with the gun’s goo. Adjust as needed. Yay goo!

Step 15
Duplicate all of the layers that make up the grenade. Separate these newly copied layers from the original ones (painstaking I know..) and then do it again. You should have 3 copies of the grenade now. For the grenade on top, change the color of all the goo to orange. Merge the layers that make up this grenade. For the second grenade, leave it green. Merge the layers that make up this grenade. For the third grenade, change all the goo to pink. Merge the layers that make up this grenade. When done, rename the layers “orange,” “green,” and “pink.” Arrange them like I have, with the orange grenade layer above the gun.

Step 16
Select the orange grenade layer. Place it above the gun to the right. Scale it and rotate it a little bit like I have. Go to Filters > Blur > Guassian Blur. Blur by 5 pixels and hit ok.
Rotate the pink grenade like I have below and then shrink it. Gaussian blur it by 6.

Step 17
Select the green grenade and Guassian blur it by 1 pixel. Do the same with the gun goo layer.

Step 18
Select the gun goo layer and go to Colors > Curves. Adjust like I have. Do the same for the grenade layers.

Step 19
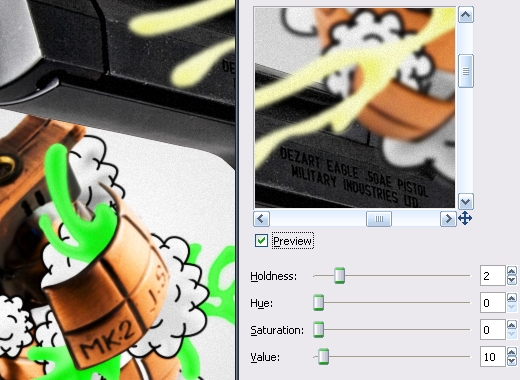
Select the background and add a radial white to black gradient. Go to Layer > New From Visible. Go to Filters > Noise > HSV Noise. Use the settings below and hit ok.

Conclusion
And we’re done! Save it and do with it what you wish. Hope you enjoyed this tutorial!

