Updated February 2025: Stop getting error messages and slow down your system with our optimization tool. Get it now at this link

The Twitch 4000 error can occur when trying to play a stream on the platform and usually appears with the message “Media Format Not Supported”.
This error can be frustrating because it occurs every few seconds or minutes while streaming. In this guide, you’ll find a list of solutions to help you solve this problem.
What causes the Twitch 4000 error message?

Twitch 4000 error can be caused by incompatible browser extensions or third-party cookies. In addition, this problem can also be caused by improper app settings or temporary errors. Fortunately, we’ve put together some helpful solutions for all of these problems.
How to fix Twitch 4000 error code?
You can now prevent PC problems by using this tool, such as protecting you against file loss and malware. Additionally, it is a great way to optimize your computer for maximum performance. The program fixes common errors that might occur on Windows systems with ease - no need for hours of troubleshooting when you have the perfect solution at your fingertips:February 2025 Update:

Update your web browser
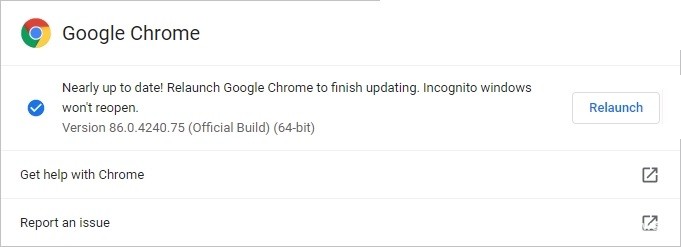
- In Google Chrome, click the three-dot icon in the top right corner of your screen, then go to Help -> About Google Chrome.
- The update will start automatically. When it’s finished, click Restart to restart the browser.
- Open Twitch and see if the streaming is working properly.
Choose the correct audio driver
- In the lower right corner of the screen, right-click the audio icon and then click Sounds.
- On the Playback tab, click the audio driver for the output device, then Set as default -> OK.
- Check on Twitch that you can stream without any problems.
Clear the browser cache for Google Chrome
- In the Google Chrome browser, press Ctrl, Shift and Delete on your keyboard simultaneously.
- Select the time period for which you want to clear the cache, then select the Cached Images and Files checkbox and click Clear Data.
- Now that all cached data has been deleted in the Google Chrome browser, refresh Twitch and see if error 4000 has been fixed.
Cleaning the cache in Mozilla Firefox
- In Firefox, click the menu icon, then select Preferences.
- Click Privacy and security -> Clear data.
- Once you’ve cleared your Firefox browser cache, refresh the page and check to see if the server connection error has been fixed.
Expert Tip: This repair tool scans the repositories and replaces corrupt or missing files if none of these methods have worked. It works well in most cases where the problem is due to system corruption. This tool will also optimize your system to maximize performance. It can be downloaded by Clicking Here
Frequently Asked Questions
How do I fix error 4000 on Twitch?
- Close other media players or streams.
- Update the stream.
- Disconnect and reconnect all audio devices.
- Change the audio card input to the main audio driver.
- Use the Twitch pop-up player.
- Change the autoplay settings in Chrome.
What causes Twitch 4000 error?
Twitch 4000 errors can be caused by incompatible browser extensions or third-party cookies. In addition, this problem can also be caused by improper app settings or temporary errors. Luckily, we've put together some helpful solutions for all of these problems.
How to clear the Twitch account cache?
Shift + Ctrl + Delete. Select All Periods as the time period. Select Cookies, Other Site Data, and Cached Images and Files. Click the Delete Data button.
