Updated February 2025: Stop getting error messages and slow down your system with our optimization tool. Get it now at this link

The video entertainment industry has grown phenomenally over the past decade. Once-popular cable TV providers and DVD rental companies have become virtually irrelevant, all thanks to the new name in town, Netflix. Thanks to the convenience Netflix offers and low rates, Netflix has added millions of customers to its already huge customer base, and that number continues to grow.
This rapid growth is also due to the new content Netflix adds to its content library each month. Netflix prides itself on the original TV shows and movies it offers on its platform. However, while the service is generally flawless and works wonderfully most of the time, streaming issues can occasionally arise.
This article discusses the problem of no audio when playing videos on Netflix, and offers a solution you can follow to fix the problem.
What causes no sound on Netflix?

- Sound driver
- Sound settings
- Other tabs in your browser
What are the solutions to the problem of missing audio on Netflix?
You can now prevent PC problems by using this tool, such as protecting you against file loss and malware. Additionally, it is a great way to optimize your computer for maximum performance. The program fixes common errors that might occur on Windows systems with ease - no need for hours of troubleshooting when you have the perfect solution at your fingertips:February 2025 Update:

Reinstall the audio drivers
- Right-click on Start.
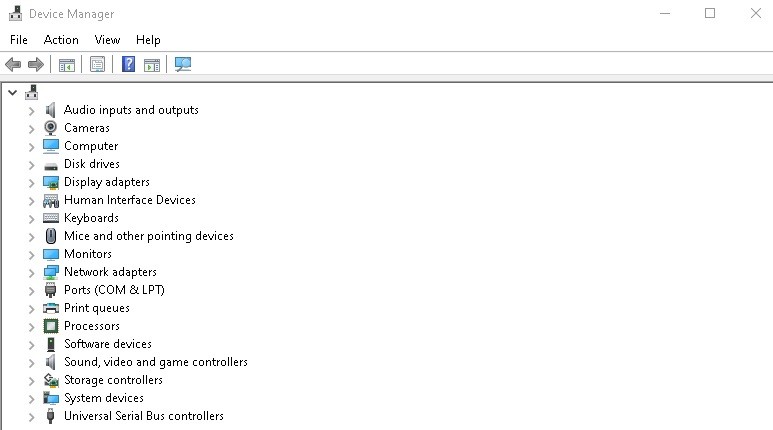
- Select Device Manager.
- Go to Sound, Video, and Game Controllers.
- Right-click an item in the Sound/Audio list and select Uninstall.
- Enable the Uninstall device drivers option.
- Right-click on Start and select Programs and Features.
- Locate your audio software, uninstall it, and restart your computer.
- After the restart, the device driver will be installed automatically.
- You can then install the latest version of the audio software.
Switch the audio output to HDMI
- Right-click on Start.
- Select Control Panel.
- Select Hardware and Sound.
- Go to the Audio section.
- Click on Manage Audio Devices.
- In the window that appears, select the device described as HDMI or Digital Audio and click Set Default.
- A green checkmark should indicate that this device is now the selected output device.
- Click OK to confirm and exit.
Changing Audio Settings
- Open Netflix.
- Select the TV show or movie you want to watch.
- Move your mouse over the computer/device screen while the show or movie is playing.
- Click the Dialog icon.
- If you selected surround sound (5.1), switch to the no 5.1 option.
- Try playing Netflix again and see if the sound recovers.
Adjust the sound to studio quality
- Locate the speaker icon in the bottom right corner of the taskbar and right-click it.
- Click Playback Devices.
- Click on the speaker.
- Click Properties.
- Click the Advanced tab.
- Select 24 bit, 192000 Hz (studio quality) from the drop-down menu.
- Select OK to save your settings.
- Try playing Netflix again and see if the sound is restored.
Expert Tip: This repair tool scans the repositories and replaces corrupt or missing files if none of these methods have worked. It works well in most cases where the problem is due to system corruption. This tool will also optimize your system to maximize performance. It can be downloaded by Clicking Here
