Updated February 2025: Stop getting error messages and slow down your system with our optimization tool. Get it now at this link

Have you noticed that the default printer keeps changing if you have multiple printers configured on your computer? This is due to a new feature in Windows 10 called “Allow Windows to control the default printer,” which automatically sets the last printer used as the default printer.
While this may be useful for some users, many others may prefer to set the default printer manually. If you want to prevent Windows from changing the default printer, you can do so in the Windows preferences or by using the Windows registry editor.
Why does the default printer keep changing?

- The first reason is that your computer has settings that allow it to change the device to whatever it thinks is most appropriate.
- The second reason is an unexpected error that your computer doesn’t tell you about, and that’s because it’s not an error that’s causing a serious problem in your computer, because there is a device that it can switch to fix the problem.
How do I fix the “Default printer keeps changing” error?
You can now prevent PC problems by using this tool, such as protecting you against file loss and malware. Additionally, it is a great way to optimize your computer for maximum performance. The program fixes common errors that might occur on Windows systems with ease - no need for hours of troubleshooting when you have the perfect solution at your fingertips:February 2025 Update:

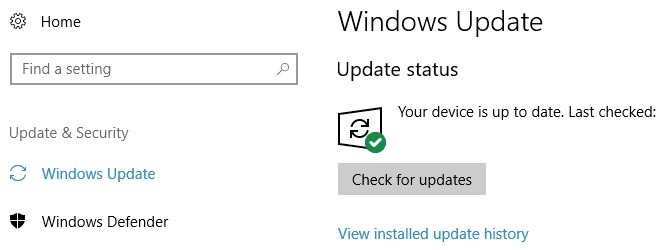
Install the latest updates
- Press the Windows + I keys to open the Settings app.
- Then go to the Update and Security section.
- Click the Check for Updates button.
Perform a system restore
- Press the Windows + S key combination and type System Restore.
- Select the Create a restore point option from the menu.
- Then click the System Restore button.
- When the System Restore window opens, click Next.
- Enable the Show other restore points option, if available, select the desired restore point and click Next.
- Follow the on-screen instructions to complete the recovery process.
Set the default printer manually
- Press Windows + S and type Control Panel. Select Control Panel from the list of results.
- Navigate to Devices and Printers.
- Select the printer that you want to use as the default printer, right-click it, and choose Set as Default Printer from the menu.
Uncheck “Allow Windows to control the default printer”
- Go to Settings -> click the Devices icon.
- Click on Printers and Scanners on the left side -> disable the “Allow Windows to control the printer by default” option.
Expert Tip: This repair tool scans the repositories and replaces corrupt or missing files if none of these methods have worked. It works well in most cases where the problem is due to system corruption. This tool will also optimize your system to maximize performance. It can be downloaded by Clicking Here
Frequently Asked Questions
Why does my printer's default setting keep changing?
The reason why the default printer keeps changing is that Windows automatically considers the last printer you used to be your new favorite printer. So when you switch from one printer to another, Windows changes the default printer based on the last printer you used. However, this is not the only reason why the default printer might change.
How do I prevent Windows 10 from changing the default printer?
- Open the Settings app.
- Go to the following page: Settings > Devices > Printers and Scanners.
- Find the "Allow Windows to control the printer by default" option and disable it.
How do I not set my printer as the default printer?
Click on "Devices (Bluetooth, printer, mouse)" in the main "Settings" window. There you will find a list of all printers and scanners currently in use. Scroll down until you see the "Allow window to control the default printer" option. Disable this feature.
