Updated February 2025: Stop getting error messages and slow down your system with our optimization tool. Get it now at this link

Microsoft Teams was launched in 2017 as unified communication and collaboration platform that helps businesses and organizations achieve their goals. Microsoft leveraged the company’s existing Office software expertise and created a unified experience with Teams, Office 365, and Skype for Business.
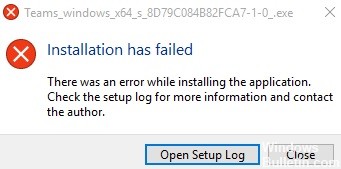
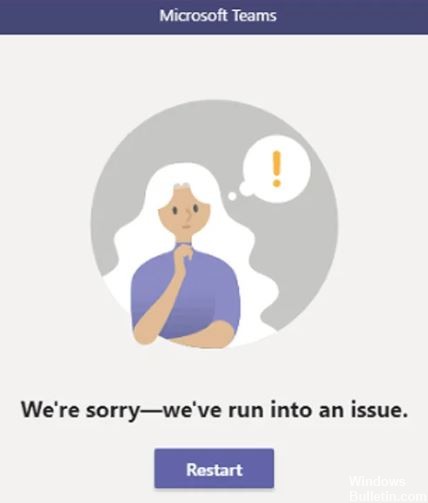
However, as with any software, things don’t always go as planned. If you’re having problems with Microsoft Teams, here’s how to fix Microsoft Teams installation issues.
What causes problems with Microsoft Teams installation?

The “Load Teams application in the background for Skype for Business users” option is enabled in the Microsoft Teams Administration Center: As long as this option is enabled, any computer on the network from which Teams has been removed will automatically download and reinstall the software without notifying the user when they log into the Skype for Business client.
Microsoft Teams is uninstalled, but Teams Machine-Wide Installer is not: The Microsoft Teams client is not the only component you need to uninstall to get rid of the program. You must also find and uninstall the Teams Machine-Wide Installer on your computer so that Teams remains uninstalled. As long as the Teams Machine-Wide Installer is on your computer, it will continue to reinstall Teams under your nose.
How to solve the Microsoft Teams installation problems?
You can now prevent PC problems by using this tool, such as protecting you against file loss and malware. Additionally, it is a great way to optimize your computer for maximum performance. The program fixes common errors that might occur on Windows systems with ease - no need for hours of troubleshooting when you have the perfect solution at your fingertips:February 2025 Update:

Launch the installer as an administrator
The “administrator mode” is a powerful tool that usually bypasses most bugs. Running most programs “as administrator” gives it a higher level of access to your computer. For installers, this can be the deciding factor between installing your application and rejecting it.
It is not usually recommended, but you can trust Microsoft Teams because it was developed by Microsoft. Most installers do not need to be run as an administrator, but if you do, you will avoid several complications that may be caused by your anti-virus and firewall.
- First, go to the Microsoft website and download Microsoft Teams.
- Now open the Downloads folder or the folder where the installer is stored.
- Depending on your browser, you can also just view the downloaded file and click View in the folder.
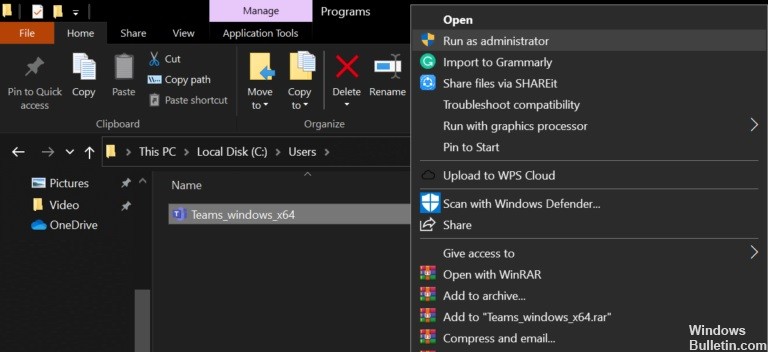
- Finally, when the installation file appears on the screen, right-click it and select Run as administrator.
- You will be prompted to confirm or even enter your system administrator credentials. Fill them out and proceed.
Any problems with authorization or virus protection should now be bypassed by the Microsoft Teams installer. We hope this solved your problem with the Microsoft Teams installation.
Complete removal of Microsoft Teams
If you try to reinstall Microsoft Teams, the installation error may be caused by an existing Microsoft Teams application on your computer. Uninstalling programs can be a tricky process if you are new to Windows 10 or are not familiar with the uninstall process.
Similarly, this problem can affect Mac users as well. In this case, uninstalling a program by simply uninstalling it can lead to leftover files. This may prevent future installation, as the operating system considers Microsoft Teams already installed.
- First, open the Start menu and type “Add or Remove Programs”.
- Select the first result of the search query.
- You should now have a window with a list of all the programs currently installed on your computer.
- Under “Applications and Features,” use the search bar and enter “Microsoft Teams.”
- Finally, click on the program and select “Uninstall”.
- Follow the instructions to complete the process.
You can also uninstall Microsoft Teams for Mac users as follows:
- Make sure that Microsoft Teams is closed and not running in the background before proceeding.
- You can check this with the Activity Monitor and Microsoft Teams search.
- Now open the Finder and go to the Applications folder.
- There, find Microsoft Teams and drag the application to the trash. This will uninstall the program.
Using the Registry Editor
The Registry Editor is a powerful collection of all the top-level settings that you can configure on your Windows operating system. Your system settings are collected and displayed in the editor, where we can easily access and adjust these files.
In this method, we will change a file that can remove or prevent the installation of Microsoft Teams. This is mainly for users who can install Microsoft Teams but find that it uninstalls or uninstalls after a few hours.
- First, open the Start menu by pressing the Windows key.
- Now type “Registry Editor” or “Regedit” and click on the first search result.
- Browse through the folders on the left until you get to the “Teams” folder. Here are the folders to open:
HKEY_CURRENT_USER\Software\Microsoft\Office\Teams. - In the Teams folder, you should find a file called PreventInstallationFromMsi. Double-click this file and change the information value to 1.
- If you can’t find the file, right-click on a space in the folder and select “New”, then “String Value”.
- Name the new file “PreventInstallationFromMsi” and set the value to 1.
Try installing Microsoft Teams the normal way or by running the installer as an administrator. This should fix the problem and prevent uninstallation by itself.
Expert Tip: This repair tool scans the repositories and replaces corrupt or missing files if none of these methods have worked. It works well in most cases where the problem is due to system corruption. This tool will also optimize your system to maximize performance. It can be downloaded by Clicking Here
Frequently Asked Questions
Why doesn't Microsoft Teams install?
One of the features of this installer is that it checks your profile for traces of Teams. If it detects any teams, it will not try to reinstall them (unless it is an update), and if the user has deleted teams, it will still detect some remnants and will not reinstall them.
How to fix Microsoft Teams loading problem?
- Use another version of Teams.
- Clear the cache.
- Download the files from SharePoint.
- Check the permissions for SharePoint files.
- Check for invalid characters.
How to solve Microsoft Teams problem?
- In the list of applications, select Admin.
- From the menu, select Settings -> Services and Add-ons.
- Find Microsoft Teams and enable External Applications.
- Set the Allow external applications in Microsoft Teams setting to On.
How can I fix the Microsoft Teams installation error?
Another solution we found is to go to C:\ProgramData\User\Microsoft\Teams and set the security permission of that folder so that the user has full control. Then reboot the computer.
