Updated February 2025: Stop getting error messages and slow down your system with our optimization tool. Get it now at this link

Does the mouse pointer on your computer select something automatically when you hover over it for a few seconds? Some Windows 10 users are complaining about a similar problem on the forum. If you encounter the same problem, don’t worry.
In this article, we are going to share some simple solutions with which you can easily solve this problem. But before we move on to more serious solutions, read what causes the issue, it will help you understand your problem quickly.
Why does the mouse pointer automatically select when hovering over a hyperlink?

All Windows devices come standard with an auto-select feature. Although it may vary depending on the version of windows you are using, it basically does the same thing. This feature can be activated without your consent for a number of reasons. Whatever the reason, it is important to disable it, especially if you have not enabled this feature yourself. When this auto-select feature is enabled, users notice a floating selection problem.
In this article, we will look at how to disable mouse pointer in Windows 10 and stop auto-select when hovering over a hyperlink.
How to stop automatic mouse pointer selection when hovering over a hyperlink?
You can now prevent PC problems by using this tool, such as protecting you against file loss and malware. Additionally, it is a great way to optimize your computer for maximum performance. The program fixes common errors that might occur on Windows systems with ease - no need for hours of troubleshooting when you have the perfect solution at your fingertips:February 2025 Update:

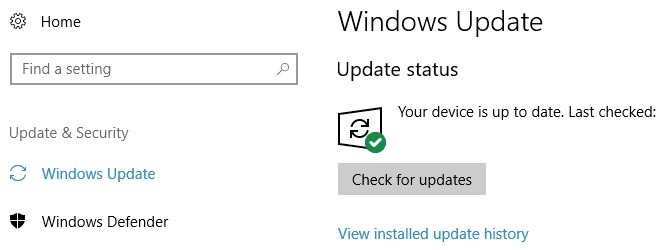
Update your system BIOS, Windows and drivers
The problem with the mouse pointer may be caused by incompatible operating system modules because the modules are not updated. In this regard, updating BIOS, Windows, and drivers to the latest versions can solve the problem.
- Update Windows and the drivers (especially the system BIOS) to the latest version.
- Don’t forget to install any additional updates as well.
- If you use an OEM utility (such as Dell Support Assistant) to update the drivers, use that utility to update the drivers.
- After updating the modules, check if the mouse hover problem has been resolved.
Disabling touchpad input
- Right-click on Start and select Settings
- Select Devices, then Mouse.
- Scroll down and select Mouse Advanced Settings
- In Mouse Properties, select the Settings tab (this section may vary depending on your laptop).
- Once you open the settings, disable the sniffing feature.
Scan your system for malware
While there are many third-party security applications, you can also use the built-in Windows Defender security tool, also known as Microsoft Defender, which has improved significantly over the years and rivals many paid antivirus programs in detection speed, stability, and ease of use.
- Type security into the Windows search box and select Windows Security.
- Select Virus and Threat Protection.
- Navigate to scan settings
- Select Full scan, and then select Scan now
Reinstall the mouse and touchpad drivers
In some cases, the auto-select problem may be due to faulty or corrupt Windows mouse drivers. Therefore, it is recommended that you reinstall the mouse drivers as described below. If you are using a laptop, you should also reinstall the touchpad drivers.
- Right-click the Start button and select Device Manager.
- Expand the Mice and other pointing devices section.
- Right-click on the mouse driver.
- Select Uninstall Device.
- Confirm the operation with the Uninstall button
Expert Tip: This repair tool scans the repositories and replaces corrupt or missing files if none of these methods have worked. It works well in most cases where the problem is due to system corruption. This tool will also optimize your system to maximize performance. It can be downloaded by Clicking Here
Frequently Asked Questions
How can I prevent my mouse from selecting hyperlink when hovering over it?
- Right-click in the Start menu.
- Select Control Panel, and then click on Usability.
- Click on Change Mouse Features.
- Find the Window Controls option, and then uncheck Activate window with mouse movement.
- Click Apply, and then click OK.
How do I disable automatic selection in Windows 10?
In Control Panel, set the display to Small icons, then select Assistance Center. Under Explore all options, select Simplify mouse usage. Under Simplify window management, uncheck the Enable windows when you hover your mouse. Then click Apply and OK.
How do I prevent my mouse from auto selecting when hovering a hyperlink?
- Open the Usability Center.
- Select Mouse Usability.
- Make sure that the Enable Hover Window option is unchecked.
- Click the OK button.
Why does my mouse automatically select?
One of the reasons why your mouse may have an auto-select problem is your touchpad. If the touchpad is malfunctioning, it can make selections and execute commands without your permission. This can happen when you try to hover the mouse over a file or folder.
