Updated February 2025: Stop getting error messages and slow down your system with our optimization tool. Get it now at this link
- Download and install the repair tool here.
- Let it scan your computer.
- The tool will then repair your computer.
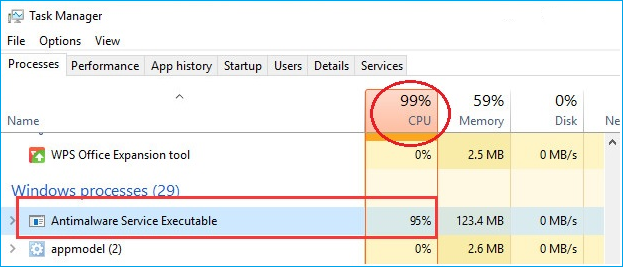
The Antimalware Service Executable process plays an important role in the Windows Defender Service, which is included in Windows 10 (and despite the similarities in name has nothing to do with Emsisoft Anti-Malware!) However, it is also known to consume much more than its fair share of CPU processing power and can even, on its own, reduce the speed of your computer to a dizzying extent.
If you are using Windows Defender and have experienced high CPU usage for exceptionally long periods of time, you will be happy to know that the problem can be easily solved.
What is Antimalware Service Executable

Windows 10 has a built-in antivirus feature called Windows Defender. The antimalware service executable is the background process of Windows Defender. This program, also known as MsMpEng.exe, is part of the Windows operating system. You will find it in the “Details” tab of your task manager.
Antimalware Service Executable file is responsible for scanning files whenever malware is accessed, running background system scans to check for malware, installing antivirus definition updates, and doing everything that a security application like Windows Defender needs to do. Scanning is highly dependent on your computer’s processor. This is why you will find that the executable file of the antimalware service has a high processor, a huge hard disk, memory, RAM and even network bandwidth, which can put a strain on your computer resources, especially after receiving an update of Windows 10.
Performing a Full Scan

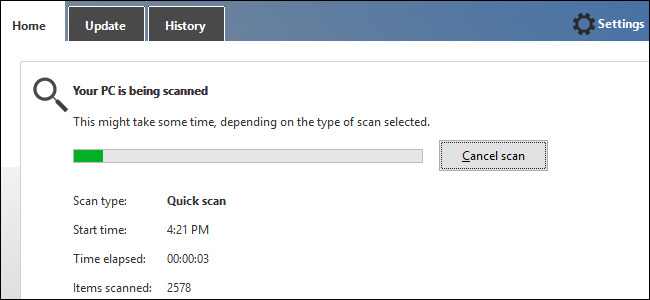
The high CPU usage caused by the Antimalware Service Executable may be due to a scan that should have been run a long time ago. Often the simplest solution is to perform a full scan. You need to stop the service in its current state and start a new scan. It is best not to use your system until the scan is complete, so that it can be performed more quickly.
- Open Windows Defender.
- Go to Virus and Threat Protection.
- Under Virus and Threat Protection Settings, click Manage Settings.
- Turn off all switches.
- Restart the system.
- When you are back on your desktop, reactivate all antivirus and threat protection settings.
- Return to the main Virus and Threat Protection tab.
- Click “Scanning Options”.
- Select “Full Scan” and click the “Scan Now” button.
- Let the scan finish.
Changing the Windows Defender Scheduling Setting
February 2025 Update:
You can now prevent PC problems by using this tool, such as protecting you against file loss and malware. Additionally, it is a great way to optimize your computer for maximum performance. The program fixes common errors that might occur on Windows systems with ease - no need for hours of troubleshooting when you have the perfect solution at your fingertips:
- Step 1 : Download PC Repair & Optimizer Tool (Windows 10, 8, 7, XP, Vista – Microsoft Gold Certified).
- Step 2 : Click “Start Scan” to find Windows registry issues that could be causing PC problems.
- Step 3 : Click “Repair All” to fix all issues.
- Click on the Start menu on the left and enter Management Tools. Click on it to open it.
- In the Administrative Tools Explorer window, select Task Scheduler. Double-click on the task scheduler to open it.
- In the left pane of the task scheduler, locate the following path:
- Library/Microsoft/Windows/Windows Defender
- If you are in the Windows Defender folder, look for the name “Windows Defender Scheduled Scan”, click it once to highlight it, then choose “Properties”.
- On the General tab, uncheck the “Run with highest privileges” option.
- In the Properties windows, click the Conditions tab, uncheck the Inactive, Power, and Network options, and click OK. Don’t worry, we will program it correctly in the next steps.
- Once this is done, we will reprogram it. Click on the properties again in the right panel, this time selecting the Triggers tab and clicking New. Here, select the Weekly or Monthly option, depending on your preferences, then select the day, click OK and make sure it is checked.
- This will reschedule the defender to work the way you want. If the scan has been done before, wait until it is finished. You will see the results once the scan is complete, but if the scan is run according to the schedule you set, you will still get high CPU usage. Repeat the same for the other three schedules.
- Windows Defender cache maintenance, Windows Defender cleanup, Windows Defender scan
- Disable the conditions, set the trigger to go off once a week.
Disable Windows Defender
Many Windows 10 users solve the problem of high CPU usage of the Antimalware Service Executable by disabling Windows Defender. If your PC is equipped with other antivirus software, you can disable Windows Defender. Otherwise, you can install a new antivirus program with lower CPU usage after disabling Windows Defender.
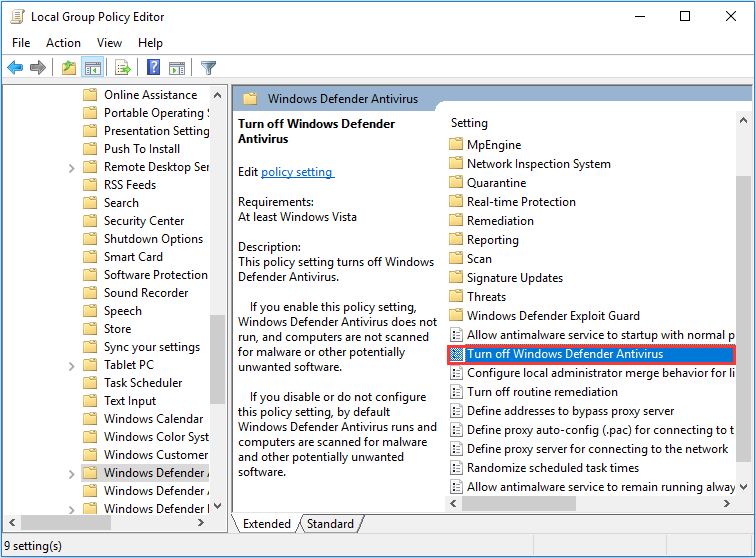
Disabling Windows Defender in the Local Group Policy Editor

- Press the Windows + R key on the keyboard to get the Run field. Then type gpedit.msc and press the Enter key to open the Local Group Policy Editor.
- Then navigate to Computer Configuration -> Administrative Templates -> Windows Components -> Windows Defender. And double-click the Disable Windows Defender setting.
- Then switch to the Enabled option to disable Windows Defender. You can then click “Apply” and then click “OK”.
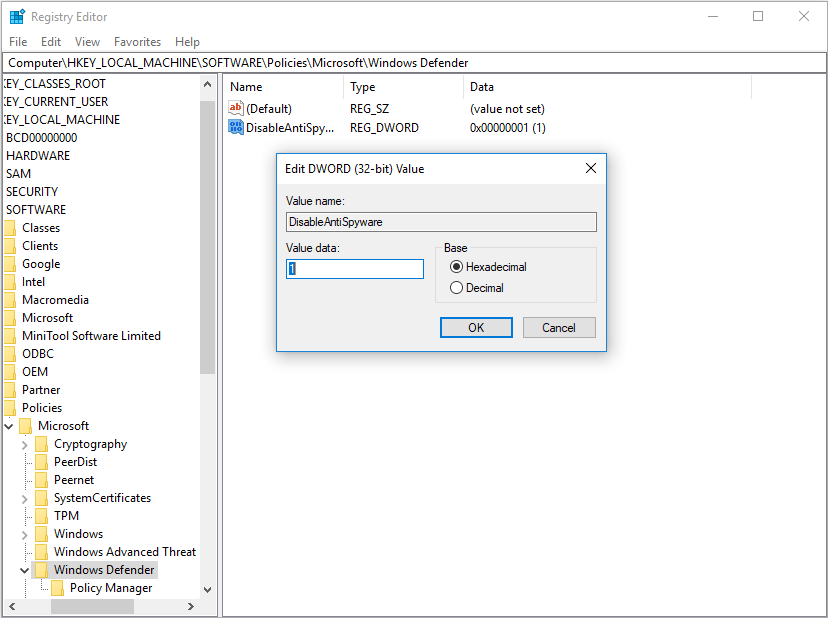
Disabling Windows Defender in the Registry

- Press the Windows and R keys on the keyboard to open the Run field. Then type regedit in the field and press the Enter key to open the Windows registry.
- Navigate to HKEY_LOCAL_MACHINE_SOFTWARE\Policies\Microsoft\Windows Defender.
- If there is a registry entry named DisableAntiSpyware, double-click it and change its value to 1.
Once you disable Windows Defender, CPU usage will return to its normal value.
Conclusion
I hope that these methods can help you solve the problems of high PC resource usage caused by the process of the Antimalware Service Executable. If you have any questions regarding this article or the process of running the antimalware service, please leave your comments below.
Expert Tip: This repair tool scans the repositories and replaces corrupt or missing files if none of these methods have worked. It works well in most cases where the problem is due to system corruption. This tool will also optimize your system to maximize performance. It can be downloaded by Clicking Here
