Updated February 2025: Stop getting error messages and slow down your system with our optimization tool. Get it now at this link
- Download and install the repair tool here.
- Let it scan your computer.
- The tool will then repair your computer.
By default, the signature is not automatically added to a meeting request that is created. In fact, it is easy to add the signature to the meeting request manually in Outlook. This article shows you how to add a signature to a meeting request in Outlook.

Here’s how to automatically add email signatures to meeting requests
These steps work on versions of Outlook 2013 – 2019, but some older versions of Outlook also support this method, but the steps may be slightly different.
- First, you will open Outlook and in the left menu, click File > Options > Click Customize Ribbon.
- On the right side, under the Customize Ribbon section, check the Developer checkbox to activate the development tools.
- Click OK.
- Then switch to the calendar view and click New Meeting on the top ribbon.
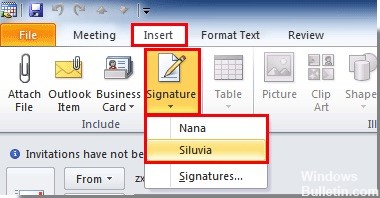
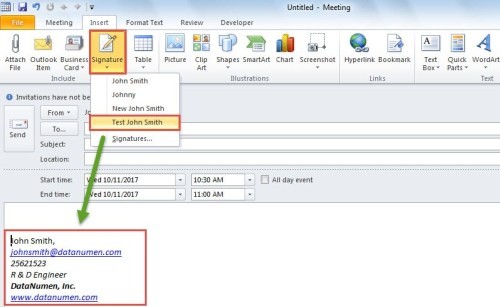
- In the New Meeting window, click the Insert tab.
- Click on the “Signature” button and select the signature you want to insert.
- Then click on the “Developer” tab on the top ribbon and click on “Design this form”.
- In the new window that opens, click on Publish > Publish Form As.
- Enter a display name for the custom form, such as “Invite Meeting”, and then click Publish.
- Close the new meeting window.
- When asked if you want to save your changes to the current meeting invitation, click No.
- To use your new custom form, go to your calendar view and click New Items > Custom Forms > Click your saved custom form on the top ribbon.
February 2025 Update:
You can now prevent PC problems by using this tool, such as protecting you against file loss and malware. Additionally, it is a great way to optimize your computer for maximum performance. The program fixes common errors that might occur on Windows systems with ease - no need for hours of troubleshooting when you have the perfect solution at your fingertips:
- Step 1 : Download PC Repair & Optimizer Tool (Windows 10, 8, 7, XP, Vista – Microsoft Gold Certified).
- Step 2 : Click “Start Scan” to find Windows registry issues that could be causing PC problems.
- Step 3 : Click “Repair All” to fix all issues.
This opens a new meeting invitation with your email signature automatically attached.

Using Outlook VBA
- First of all, you can access the Outlook VBA Editor as described in the article – “How to run VBA code in Outlook”.
- Then copy the following VBA code into the “ThisOutlookSession” project.
Private Sub Application_ItemSend(ByVal Item As Object, Cancel As Boolean)
Dim objMeeting As Outlook.MeetingItem
Dim strSignatureFile As String
Dim objFileSystem As Object
Dim objTextStream As Object
Dim strText As String
Dim objTempMail As Outlook.MailItem

If TypeName(Item) = "MeetingItem" Then
Set objMeeting = Item

'Change the path to your own signature file
strSignatureFile = CStr(Environ("USERPROFILE")) & "\AppData\Roaming\Microsoft\Signatures\Test John Smith.htm"
Set objFileSystem = CreateObject("scripting.FileSystemObject")
Set objTextStream = objFileSystem.OpenTextFile(strSignatureFile)
strText = objTextStream.ReadAll

Set objTempMail = Outlook.Application.CreateItem(olMailItem)
objTempMail.Display
objTempMail.HTMLBody = strText

objMeeting.Body = objMeeting.Body & vbCrLf & vbCrLf & objTempMail.Body
objMeeting.Save

objTempMail.Close olDiscard
End If
End Sub
- Then modify the commented code according to your own case.
- From now on, each time you send an outgoing meeting invitation, the predefined signature is automatically inserted at the end.
Expert Tip: This repair tool scans the repositories and replaces corrupt or missing files if none of these methods have worked. It works well in most cases where the problem is due to system corruption. This tool will also optimize your system to maximize performance. It can be downloaded by Clicking Here
