Updated May 2024: Stop getting error messages and slow down your system with our optimization tool. Get it now at this link
- Download and install the repair tool here.
- Let it scan your computer.
- The tool will then repair your computer.
Users of the previous version of Windows can easily share with others via the home group. This feature has been introduced in the Windows 7 operating system. You can use the home group to share files and printers with other people in your home group. A password was created to join a specific group of computers, which were then all connected together to share files and printers.
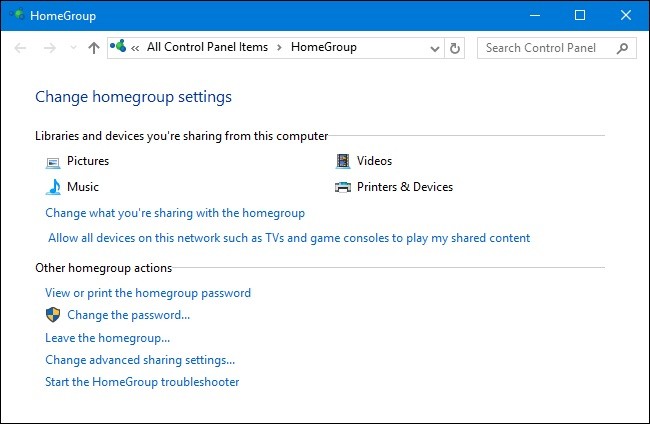
A home group is a group of PCs on a home network that are allowed to share files and printers. However, many users now complain about the missing functionality in their Windows 10.
Why is It Missing?
The original group has been removed from Windows 10 (version 1803). Microsoft has initiated a procedure to remove the home group function in Windows. The original group has been removed from the File Explorer (This computer), Control Panel and Settings application. You cannot share new files and printers from the home group.
Depending on the company, the home group is ideal for sharing before the advanced updates that are included in Windows 10. There are now updated sharing features in the operating system that no longer recommend the home group. Although it has been removed, you can share printers and files using the features built into Windows 10.
So, how do you share files and the printer with others? Consider the following methods:
How to Share Files in Windows 10
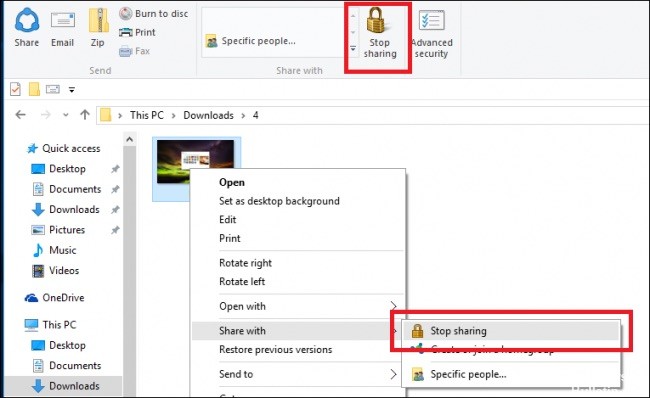
Use the File Explorer:
- Open the File Explorer.
- Locate the folder or file you want to share.
- Right-click on the folder(s) and browse for the Grant Access option. Under the option, click on Specific People.
- You can select the users for whom you want to share files. Under Network Access, select Local Users or All. For local users, you must specify the user name and password of the account to access the files. The Everyone option does not need a password because it automatically shares files with everyone on the network.
- Click on the Add button.
- Look below for the “Permission Level”. You can select the type of authorization you want to grant. Read does not allow changes, only reading. Read/Write allows for change. Remove prevent the specified user or group from accessing the folder and its contents.
- Click on the Share button.
- Right-click on the path to the shared folder and select Copy link.
- Click on the Close button.
May 2024 Update:
You can now prevent PC problems by using this tool, such as protecting you against file loss and malware. Additionally, it is a great way to optimize your computer for maximum performance. The program fixes common errors that might occur on Windows systems with ease - no need for hours of troubleshooting when you have the perfect solution at your fingertips:
- Step 1 : Download PC Repair & Optimizer Tool (Windows 10, 8, 7, XP, Vista – Microsoft Gold Certified).
- Step 2 : Click “Start Scan” to find Windows registry issues that could be causing PC problems.
- Step 3 : Click “Repair All” to fix all issues.
Use Share:
- Open the File Explorer.
- Navigate to the folder containing the files you want to share.
- Select one, several or all files.
- Click on the Share tab.
- Click on the Share button.
- Select a contact, a sharing device near you or one of the Microsoft Store applications.
- Follow the on-screen instructions to share content.
How to Share Printer in Windows 10
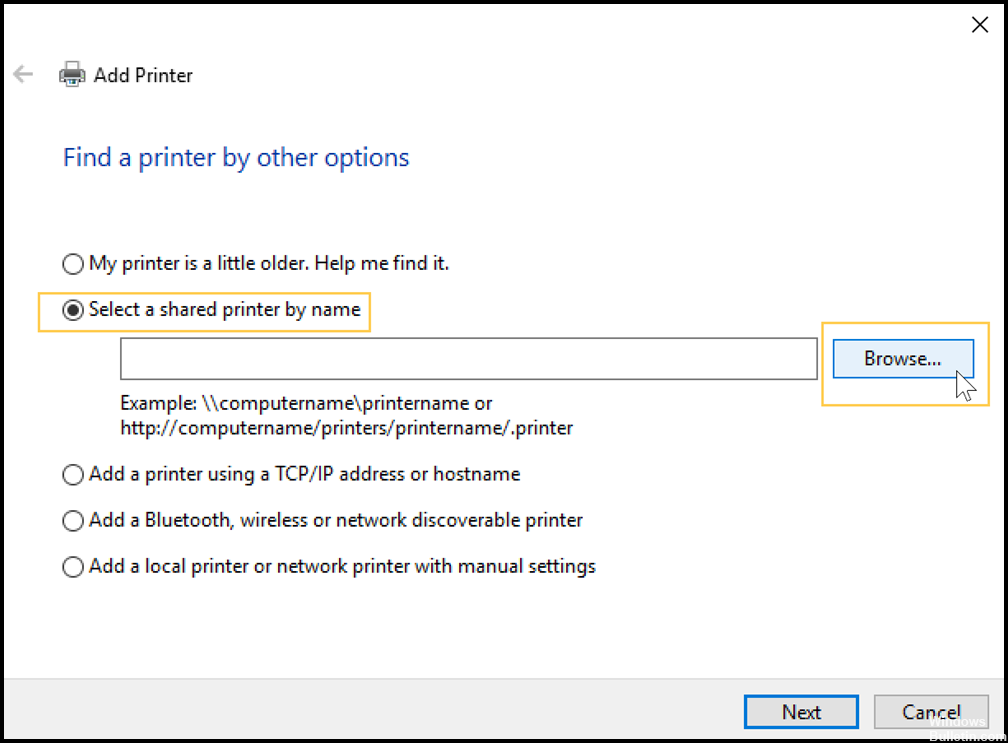
- Open the “Run” prompt by simultaneously pressing the “Windows” + “R” keys.
- Type Control Panel, then press Enter.
- Look for the “Hardware and Sound” and under it you will find the option “View Device and Printers”, click on the button.
- Locate the printer you want to share, right-click it and select Properties.
- Locate the Share tab and click on . Activate the’Share this printer’ button and the option’Render Print Jobs on Client Computers’.
- Click OK to apply the changes.
- Then go to the system tray and search for’Wifi’ or’Ethernet’.
- Right-click the option, then click Open Network and Internet Settings.
- Look for the “Sharing Options” and click on the option.
- Under Network Discovery, select’Turn on Network Discovery’. Under File and Printer Sharing, select Turn on Printer and File Sharing.
- Click on’Save Changes’ to apply the changes and start sharing your printer.
https://support.microsoft.com/en-ph/help/4091368/windows-10-homegroup-removed
Expert Tip: This repair tool scans the repositories and replaces corrupt or missing files if none of these methods have worked. It works well in most cases where the problem is due to system corruption. This tool will also optimize your system to maximize performance. It can be downloaded by Clicking Here
