Author name: Carter Blakefield

Windows

How To Reset The Windows Reliability Monitor

The Reliability Monitor in Windows is a system tool that tracks various events and errors on your computer to provide a historical view of your system’s stability. It offers a Stability Index score, ranging from 1 (least stable) to 10 (most stable), helping users identify trends and pinpoint issues over time.

To reset the Reliability Monitor in Windows, you can follow these instructions:

Viewing Reliability History in Windows

The Reliability Monitor in Windows is a useful tool that provides a detailed view of your system’s stability over time. To access and view your Reliability History, follow these steps:

  1. Accessing Reliability Monitor:
    1. Type “View reliability history” into the Windows Search bar.
    2. Click on the “View reliability history” option that appears in the search results. This action will open the Reliability Monitor.
    Understanding the Interface:
    • The Reliability Monitor window displays a graph showing the Stability Index over time, rated from 1 (least stable) to 10 (most stable).
    • Below the graph, you’ll see a timeline of events, including software installations, system updates, hardware failures, and Windows failures.
    • Each event is marked on the graph, allowing you to correlate changes in system stability with specific events.
    Exploring Further:
    • You can view detailed information about each event by clicking on it. This provides insights into what caused the event and any related errors or warnings.
    • The Reliability Monitor also offers a summary at the bottom, giving you a quick overview of recent activities affecting system stability.

    Resetting Reliability Monitor Using UI

    Resetting the Reliability Monitor clears all the problem reports and resets the stability index. To reset the Reliability Monitor using the UI, follow these steps:

    1. Navigating to Reliability Monitor:
      1. Open the Control Panel.
      2. Go to “System and Security” and then to “Security and Maintenance”.
      3. Under the Maintenance section, click on the “View reliability history” link.
      Resetting the Monitor:
      1. In the Reliability Monitor window, scroll to the bottom and click on “View all problem reports”.
      2. In the Problem Reports window, find and click on the “Clear all problem reports” option.
      3. A confirmation prompt will appear. Click “Clear all” to confirm the action.
      Completion:After completing these steps, the Reliability Monitor will reset, and the history of events and stability index will start afresh.

      Resetting Reliability Monitor Using Batch Script

      If you prefer a quicker method to reset the Reliability Monitor, you can use a batch script. This method automates the process and is especially useful for advanced users or for repetitive tasks. Follow these steps to reset the Reliability Monitor using a batch script:

      1. Creating the Batch Script:
          1. Open Notepad or any text editor.
          2. Copy the following script into the text editor:

          reg add "HKLM\SOFTWARE\Microsoft\Reliability Analysis\WMI" /v WMIEnable /T REG_DWORD /D 1 /F del /f /S /Q /A "%ProgramData%\Microsoft\RAC\PublishedData\*" del /f /S /Q /A "%ProgramData%\Microsoft\RAC\StateData\*" @echo off FOR /F "tokens=1,2*" %%V IN ('bcdedit') DO SET adminTest=%%V IF (%adminTest%)==(Access) goto noAdmin for /F "tokens=*" %%G in ('wevtutil.exe el') DO (call :do_clear "%%G") echo. echo goto theEnd :do_clear echo clearing %1 wevtutil.exe cl %1 goto :eof :noAdmin exit read more

Windows

Fix MSVCR110.dll is missing on your computer

The “MSVCR110.dll is missing” error occurs when a Windows application requires the MSVCR110.dll file, a part of the Microsoft Visual C++ Redistributable package, but the file is either not present or corrupted.

This issue commonly arises after software installations or updates and can be resolved by updating Windows, reinstalling the Visual C++ Redistributable package, or restoring the DLL file from a trusted source.

To address the issue of the missing MSVCR110.dll file on Windows, here’s a guide based on the latest solutions and approaches: read more

Windows

Fix “We couldn’t complete the updates. Undoing changes. Don’t turn off your computer” Error

The “We couldn’t complete the updates. Undoing changes. Don’t turn off your computer” error occurs when Windows fails to install updates and attempts to revert the changes. This can be caused by various issues like corrupted files, insufficient space, or conflicts with software.

To resolve the “We couldn’t complete the updates. Undoing changes. Don’t turn off your computer” error, there are several strategies you can try:

1. Run the Windows Update Troubleshooter

The Windows Update Troubleshooter is a built-in tool designed to diagnose and fix common issues with Windows Update. Follow these steps to run the troubleshooter: read more

Windows

How to Run Bash in Windows 10

To run Bash on Ubuntu in Windows 10, you can use the Windows Subsystem for Linux (WSL). Here are the steps to get it running:

1. Enable Windows Subsystem for Linux (WSL)

To use Bash on Windows, you first need to enable the Windows Subsystem for Linux. This feature allows you to run a GNU/Linux environment directly on Windows without the overhead of a traditional virtual machine or dualboot setup.

  1. Open PowerShell as Administrator:Search for PowerShell in the Windows search bar, right-click on it, and select ‘Run as administrator’.
  2. Run the Enable Command:Type Enable-WindowsOptionalFeature -Online -FeatureName Microsoft-Windows-Subsystem-Linux and press Enter.
  3. Confirmation:After executing the command, you may be asked to confirm your choice or restart your computer.

2. Restart Your PC

Once the WSL feature is enabled, you’ll need to restart your computer. This is necessary for the changes to take effect and for the subsystem to be fully operational. read more

windows-control-panel-sound
Windows

Fix Windows 10/11 automatic volume increase

To address the issue of automatic sound level control in Windows 10, there are several solutions and helpful instructions you can follow:

windows-control-panel-sound

Normalize Sound Volume Using Loudness Equalization

This feature helps maintain a consistent sound level across applications and web browsers. It’s particularly useful when you’re experiencing varying volume levels while streaming music or watching videos.

  1. Open Settings: Start by opening the Windows Settings app.
  2. Access Sound Settings: Navigate to System > Sound.
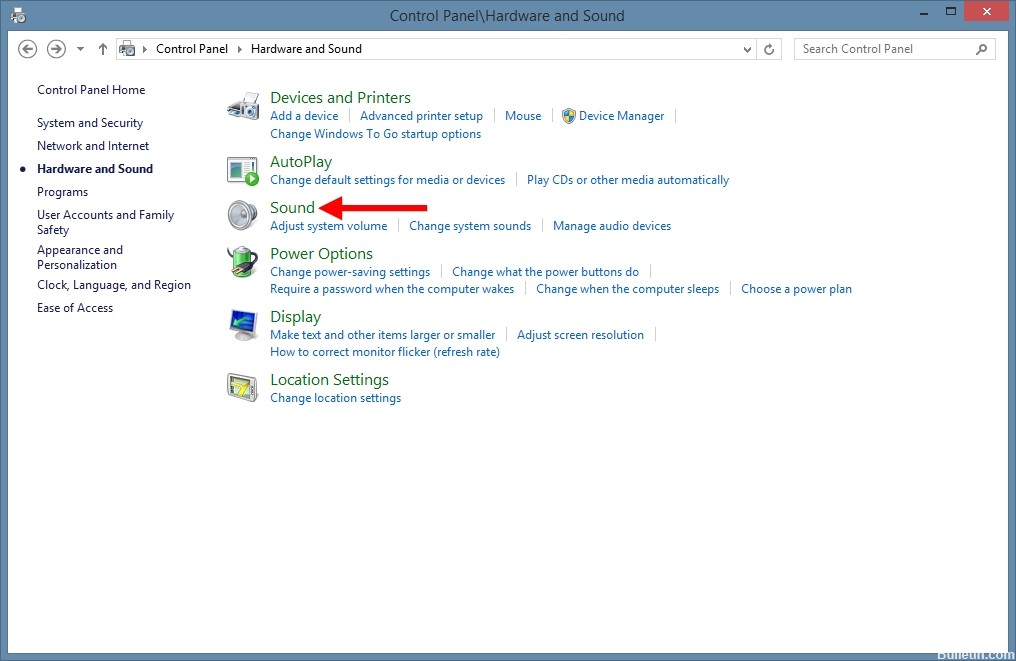
  3. Sound Control Panel: In the “Related Settings” section, click on the “Sound Control Panel” option.
  4. Select Playback Device:
    • Click on the Playback tab.
    • Select the speaker or headphones currently set as the default (indicated by a green checkmark).
  5. Device Properties: Click the Properties button for your default device.
  6. Enable Loudness Equalization:
    • Go to the Enhancements tab.
    • Check the “Loudness Equalization” option.
    • Apply the changes and click OK.

Disable Allow Applications to Take Control Option

Prevent applications from automatically controlling the sound device to avoid unexpected volume changes.

  1. Run Command: Press Windows key + R, type mmsys.cpl and press Enter.
  2. Default Sound Device: Right-click on your default sound device (Speaker or Headphone) and select Properties.
  3. Advanced Tab: Go to the Advanced tab in the device properties.
  4. Disable Control: Uncheck “Allow applications to take control of this device” and click OK.

Edit Sound Control Panel Settings

Adjust settings in the sound control panel to ensure your computer doesn’t automatically adjust the volume during communications. read more

Windows

How to open the Control Panel in Windows 10/11

To access the Control Panel in Windows, there are several methods you can use, suitable for both Windows 10 and Windows 11. Here’s a summary of the most effective ways:

1. Using the Search Bar

Accessing the Control Panel through the search bar is an efficient and straightforward method. This approach is especially useful for users who prefer a quick search-based interface.

  1. Access the Start Menu: Click on the Start button or press the Windows key on your keyboard to open the Start Menu.
  2. Type ‘Control Panel’: In the search box at the bottom of the Start Menu, type “Control Panel”.
  3. Select the Best Match: From the search results, select ‘Control Panel’. It typically appears as the top result.

2. Through File Explorer

File Explorer, known for its user-friendly graphical interface, is another convenient way to access the Control Panel.

  1. Open File Explorer: Click on the folder icon located on the taskbar to launch File Explorer.
  2. Navigate to Control Panel: Once File Explorer is open, follow these steps:
    • Select ‘Desktop’ from the left sidebar.
    • Find and click on the ‘Control Panel’ icon.

3. Run Dialog Box

The Run dialog box is a powerful feature in Windows that allows quick access to various system functions, including the Control Panel. read more

Windows

How to Start Windows 10/11 in Safe Mode

Starting Windows 10 or 11 in Safe Mode can be crucial for troubleshooting issues. Here’s a guide with updated information and instructions, divided into several sections for ease of understanding.

1. Starting from Settings

Accessing Safe Mode through Windows Settings is an effective method, particularly when the operating system is functioning normally but troubleshooting is necessary.

  1. Access Settings:Press the Windows logo key + I to open Settings directly. Alternatively, click on the Start button and then select Settings.
  2. Navigate to Recovery Options:Inside Settings, navigate to the ‘Update & Security’ section, and then click on the ‘Recovery’ tab on the left sidebar.
  3. Initiate Advanced Startup:Under the Advanced startup section, find and click on the ‘Restart now’ button. This action will reboot your PC into an advanced startup mode.
  4. Advanced Options:After your PC restarts, a screen will appear with several options. Here, select ‘Troubleshoot’, then ‘Advanced options’, followed by ‘Startup Settings’, and finally click ‘Restart’.
  5. Enter Safe Mode:Once your PC restarts again, it will display a list of options. Press 4 or F4 to start your PC in Safe Mode. If you need internet access, select 5 or F5 to start in Safe Mode with Networking.

2. Using the Sign-in Screen

Starting Safe Mode from the Windows sign-in screen is useful if you cannot access the desktop or Settings app.

  1. Shift + Restart Combination:At the Windows sign-in screen, hold the Shift key down. While holding it, select the Power button on the bottom right of the screen and then click on ‘Restart’.
  2. Troubleshoot and Advanced Options:Once your PC restarts, on the ‘Choose an option’ screen, select ‘Troubleshoot’, then ‘Advanced options’, followed by ‘Startup Settings’, and finally click ‘Restart’.
  3. Select Safe Mode:After the restart, a list of options will be displayed. Press 4 or F4 to start in Safe Mode. For network access, press 5 or F5 for Safe Mode with Networking.

3. From a Black or Blank Screen

If your PC is unresponsive and presents a black or blank screen, you can still access Safe Mode through a series of hardware resets. read more

Windows

Windows could not connect to your Bluetooth network device

When encountering the error message “Windows could not connect to your Bluetooth network device” while attempting to pair a Bluetooth device with your Windows 10 PC, it indicates a connection issue. This problem often occurs when trying to connect various Bluetooth-enabled devices, such as mobile phones, to a Windows 10 computer. To effectively address and resolve this issue, certain troubleshooting steps need to be followed.

1. Run the Bluetooth Troubleshooter

Windows includes a built-in tool to automatically identify and fix common Bluetooth connection issues. read more

Windows

Fixing Cortana No Sound Issues in Windows 10

To resolve the issue of no sound from Cortana in Windows 10, there are several methods you can try:

1. Update Audio Drivers

Outdated or incorrect audio drivers are a common cause for sound issues with Cortana. Updating your drivers can resolve these problems.

  1. Access Device Manager:
    • Press Windows Key + X and select Device Manager from the menu.
  2. Update Audio Driver:
    • In Device Manager, expand the ‘Audio inputs and outputs’ section.
    • Right-click your audio device and select ‘Update driver’.
    • Select ‘Search automatically for updated driver software’ and follow the on-screen instructions.

Note: If Windows doesn’t find a new driver, you may need to visit the device manufacturer’s website for the latest drivers​​.

2. Disable Digital Output

Multiple playback devices can interfere with Cortana’s sound. Disabling unused digital outputs might resolve the issue.

  1. Access Sound Settings:
    • Right-click the sound icon on your taskbar and select ‘Playback devices’.
  2. Disable Unused Digital Output:
    • Find and right-click the digital output device you are not using and select ‘Disable’.

Restart your PC to ensure the changes take effect​​. read more

Windows

How to Fix ‘Right-Click Not Working’ Issue in Windows

If you’re facing issues with the right-click function not working in Windows, there are several methods you can try to resolve the issue.

1. Check for Hardware Issues

Before delving into software solutions, it’s important to rule out any hardware-related problems with your mouse.

  • Wireless Mouse Issues:
    • Replace old batteries with new ones, as low battery levels can cause erratic signals and malfunctions​.
    • Re-plug the wireless receiver into the USB port of your computer, ensuring a secure connection​​.
    Soft Reset Your Mouse:
    • Unplug the mouse from your PC.
    • Press and hold both the left and right mouse buttons.
    • While holding the buttons, reinsert the mouse cable into the USB port of your computer.
    • Continue holding the buttons for 5-10 seconds, then release and check if the issue is resolved​​.
    Hardware Connection Issues:If the above steps do not resolve the issue, there might be a hardware problem with the mouse itself. This could be due to a loose cable connection or a malfunctioning right-click switch.
    • Consider disassembling your mouse and checking the internal cable connections.
    • If comfortable with hardware, re-solder the right-click switch if it appears detached.
    • If under warranty, consider getting a replacement for your mouse​.

    2. Enable Context Menu From Local Group Policy Editor

    If the hardware checks out, the issue might be due to software settings, such as the context menu being disabled in Windows.

    1. Press Win + R to open the Run dialog box, type gpedit.msc, and press Enter to open the Local Group Policy Editor.
    2. Navigate to User Configuration > Administrative Templates > Windows Components > File Explorer.
    3. Find and double-click the option that disables the context menu.
    4. Select ‘Disabled’ and click ‘OK’ to enable the context menu.
    5. Restart your computer and check if the right-click functionality is restored​​.

    3. Check Mouse Button Remapping

    Issues with right-click functionality can also arise from incorrect button remapping, especially when using specific applications or third-party remapping tools. read more

Scroll to Top