Updated April 2024: Stop getting error messages and slow down your system with our optimization tool. Get it now at this link
- Download and install the repair tool here.
- Let it scan your computer.
- The tool will then repair your computer.
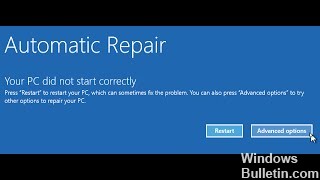
It can be very annoying to encounter the error Automatic Repair “Your PC did not start correctly” when starting your PC. It prevents you from starting your PC and accessing its data. To avoid data loss, you must repair it as soon as possible.
Use the Safe Mode
Safe mode is a Windows troubleshooting option that starts your computer in a limited state. Only the basic files and drivers required to run Windows are launched. The words Safe Mode appear in the corners of your screen to indicate the Windows mode you are using.
Follow the steps below and see if it helps you.
- Type Update and Recovery in the search in the Start menu.
- Click Update and Restore, then Restore.
- Under Advanced Start, click Restart Now.
If you cannot connect to your PC or your PC is on the lock screen:
- Hold down the Shift key on your keyboard.
- Click on the Power button.
- While holding down the Shift key,
- Click on Restart
- On the Select Options screen, click Troubleshooting.
- Click on Startup Settings
- If the Startup Settings option does not appear, click Advanced Options.
- Click on Startup Settings.
- Click on Restart.
- On the Startup Settings screen, select Safe Mode.
- Log in to your PC with a user account with administrator rights.
April 2024 Update:
You can now prevent PC problems by using this tool, such as protecting you against file loss and malware. Additionally, it is a great way to optimize your computer for maximum performance. The program fixes common errors that might occur on Windows systems with ease - no need for hours of troubleshooting when you have the perfect solution at your fingertips:
- Step 1 : Download PC Repair & Optimizer Tool (Windows 10, 8, 7, XP, Vista – Microsoft Gold Certified).
- Step 2 : Click “Start Scan” to find Windows registry issues that could be causing PC problems.
- Step 3 : Click “Repair All” to fix all issues.
Repair System with a Bootable USB/DVD Drive
Sometimes, if the automatic repair of Windows does not solve the problem, the repair of your system can be done through the Windows Recovery Environment (WinRE). You will need a bootable USB drive, CD or DVD to do the job. Here’s how to do it:
- Insert your bootable drive.
- Boot from a bootable drive.
- When the Windows Configuration window appears, click Repair Computer at the bottom left of the window.
- Review the process and see if it helps you.
Open Command Prompt and Run System File Checker

- You can try running the sfc/scannow command at the command prompt to correct the fact that your PC did not start the loop problem correctly.
- Insert the bootable Windows drive and boot from it.
- Select your language settings and click on Next.
- Click on Repair your computer.
- Click on Troubleshooting.
- Click on Command prompt.
- Type sfc /scannow and press Enter to launch the system file checker.
- Enter exit and press Enter.
- Restart your PC and check if the error “Your PC did not start correctly” is present.
Expert Tip: This repair tool scans the repositories and replaces corrupt or missing files if none of these methods have worked. It works well in most cases where the problem is due to system corruption. This tool will also optimize your system to maximize performance. It can be downloaded by Clicking Here
