Updated April 2024: Stop getting error messages and slow down your system with our optimization tool. Get it now at this link
- Download and install the repair tool here.
- Let it scan your computer.
- The tool will then repair your computer.
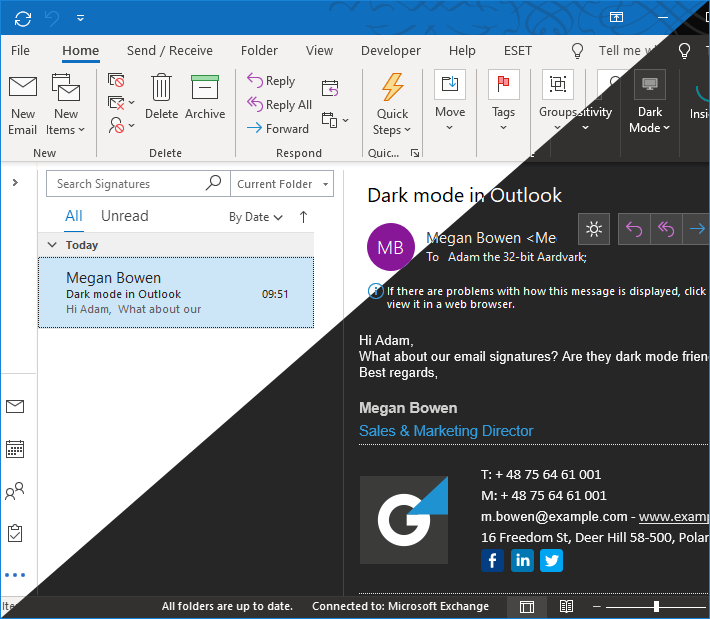
Microsoft Office contains black and dark grey themes. The dark mode in Windows 10 does not affect Office applications, but you can choose a dark theme for Office applications such as Microsoft Word, Excel, Outlook, and PowerPoint.
This works for Office 365, Office 2016, and Office 2013. It works on all versions of Windows, including Windows 7, 8, or 10. However, dark themes are not currently available for Office on the Mac.
Enable Dark Mode in Microsoft Office using the Account Settings
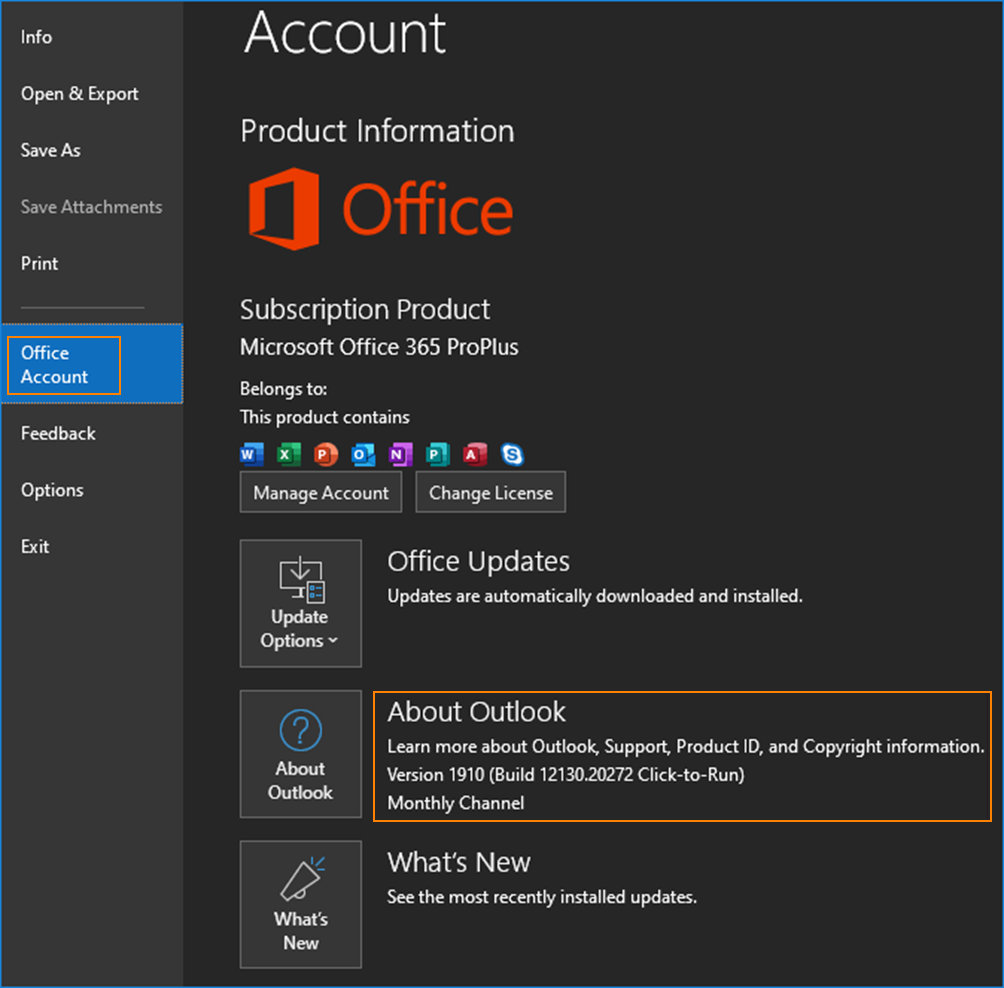
- Open one of the Microsoft Office applications by clicking the shortcut or by searching in the Windows search function. Click the File menu at the top of the page.
- Now click the Account or Office Account option. There you will find an option for the topic, click on the topic menu and select the Dark Grey option.
- Note: You can also select the Black topic, which will be darker than Dark Grey.
- If you select this option, the theme is automatically changed for all other Microsoft Office applications.
April 2024 Update:
You can now prevent PC problems by using this tool, such as protecting you against file loss and malware. Additionally, it is a great way to optimize your computer for maximum performance. The program fixes common errors that might occur on Windows systems with ease - no need for hours of troubleshooting when you have the perfect solution at your fingertips:
- Step 1 : Download PC Repair & Optimizer Tool (Windows 10, 8, 7, XP, Vista – Microsoft Gold Certified).
- Step 2 : Click “Start Scan” to find Windows registry issues that could be causing PC problems.
- Step 3 : Click “Repair All” to fix all issues.
Change the Microsoft Office Theme to Dark Mode using the Office Options
- Open any Office application. We chose Word for this tutorial, but Excel or PowerPoint work just as well. Click or press the File tab on the Ribbon.
- Go to Options in the left column.
- A new window appears with options for the Office application you are using. In our case, these are Word options. Go to the General section on the left, then look for the Office Theme drop-down list. Click on it and select the topic you want: Black, dark grey, coloured or white. Then click or press OK.
- You can also change the background of your Office requests and apply a new template. Click or tap the Desktop Background drop-down list and select a template you like. Then click OK or press OK.
Unfortunately, the documents you create always have a white background and black text by default. You could change your documents to have a black background and white text, but those colors would be part of every document you save.
For example, if you send such a Word document to someone else, they will see a black background with white text when they open it. This would require a large amount of ink or toner if someone were also to print such a document.
Conclusion
The dark mode is beautiful. This feature is very popular in most applications and operating systems turns off the lights and brightness and makes things easier to understand and read. In this guide, we’ve explained how to enable dark mode in Office 365 on Windows 10.
https://support.office.com/en-us/article/dark-mode-in-outlook-3e2446e0-9a7b-4189-9af9-57fb94d02ae3
Expert Tip: This repair tool scans the repositories and replaces corrupt or missing files if none of these methods have worked. It works well in most cases where the problem is due to system corruption. This tool will also optimize your system to maximize performance. It can be downloaded by Clicking Here
